Relocating Compute Instances

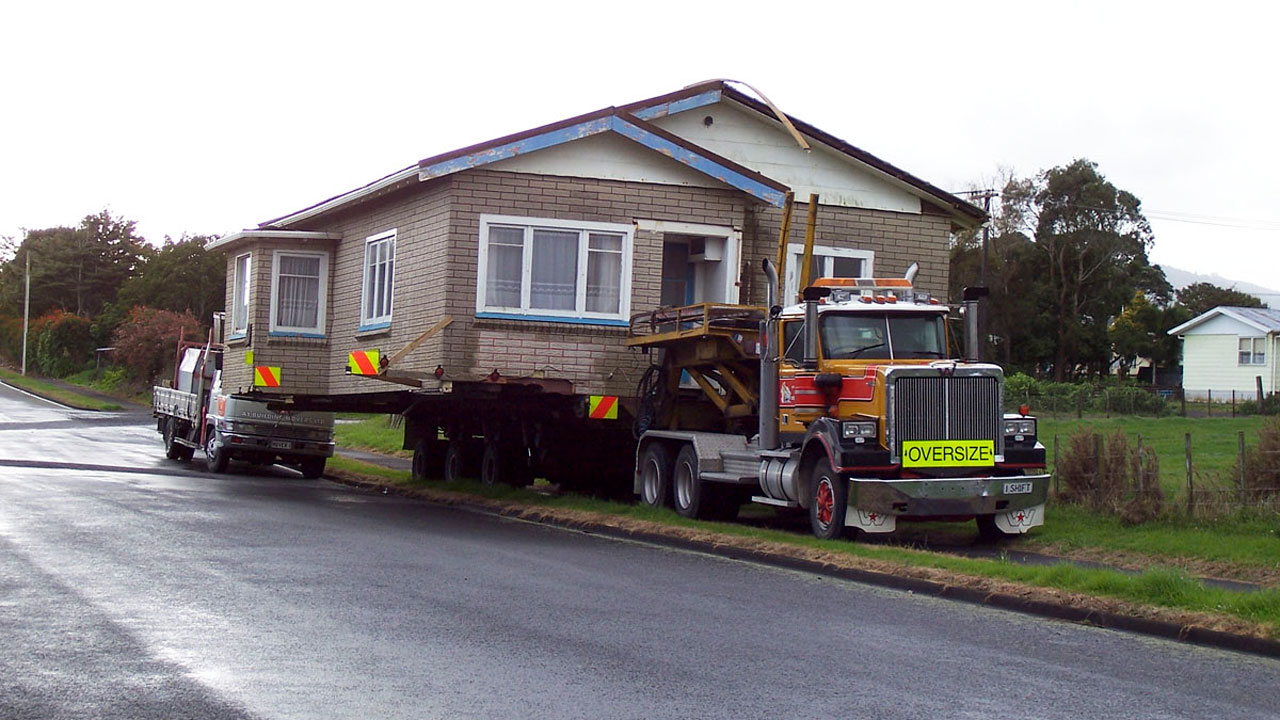
To everyone following my 30 Days on the Oracle Cloud experience, I apologise that I was not able to keep up with the series previously, due to work commitments. I have enrolled in yet another trial, so I am hoping to continue where I left off and share my thirty day adventure with an Oracle Cloud trial. I'm on Day 14 now, and for this post, I'll examine an important issue that many of us face, even in our personal life - moving houses!
Suppose I had a compute instance running Oracle Application Express (APEX) to perform some proof of concept tasks and now I am ready to move it from my Oracle Cloud tenancy to a client's. There are several recipes for achieving this goal. I could for example, use the Oracle Database's backup and recovery, or data migration tools, but is there a simpler approach? What if I could clone the server and then ship it over to be deployed on my client's tenancy?
This is definitely possible and I will walk you through a simple procedure to perform this migration exercise.
Create and Export a Custom Image
First, on the source tenant, create a custom image of the compute instance and then prepare the image for export.
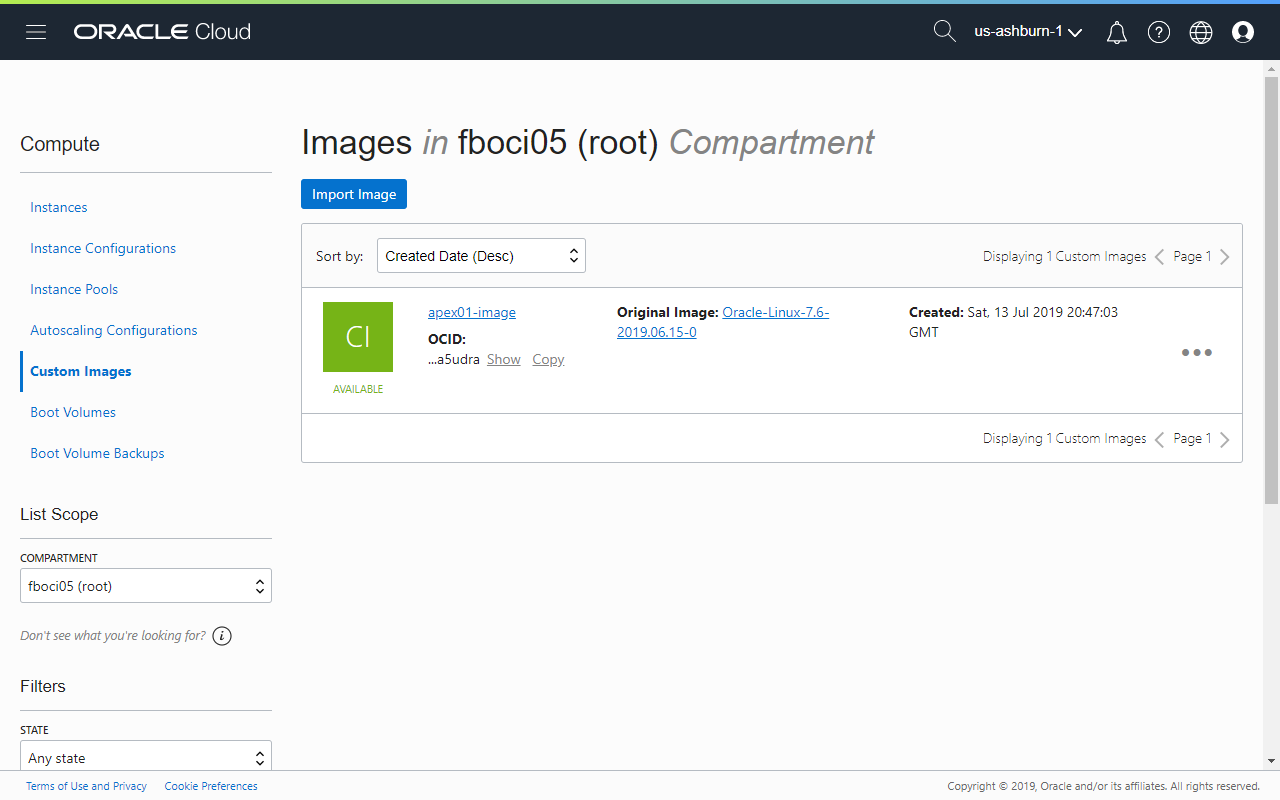
- Click Compute Instances.
- Place the mouse cursor over the and then click "Create Custom Image". WARNING: this will initiate a system shutdown on the target instance!
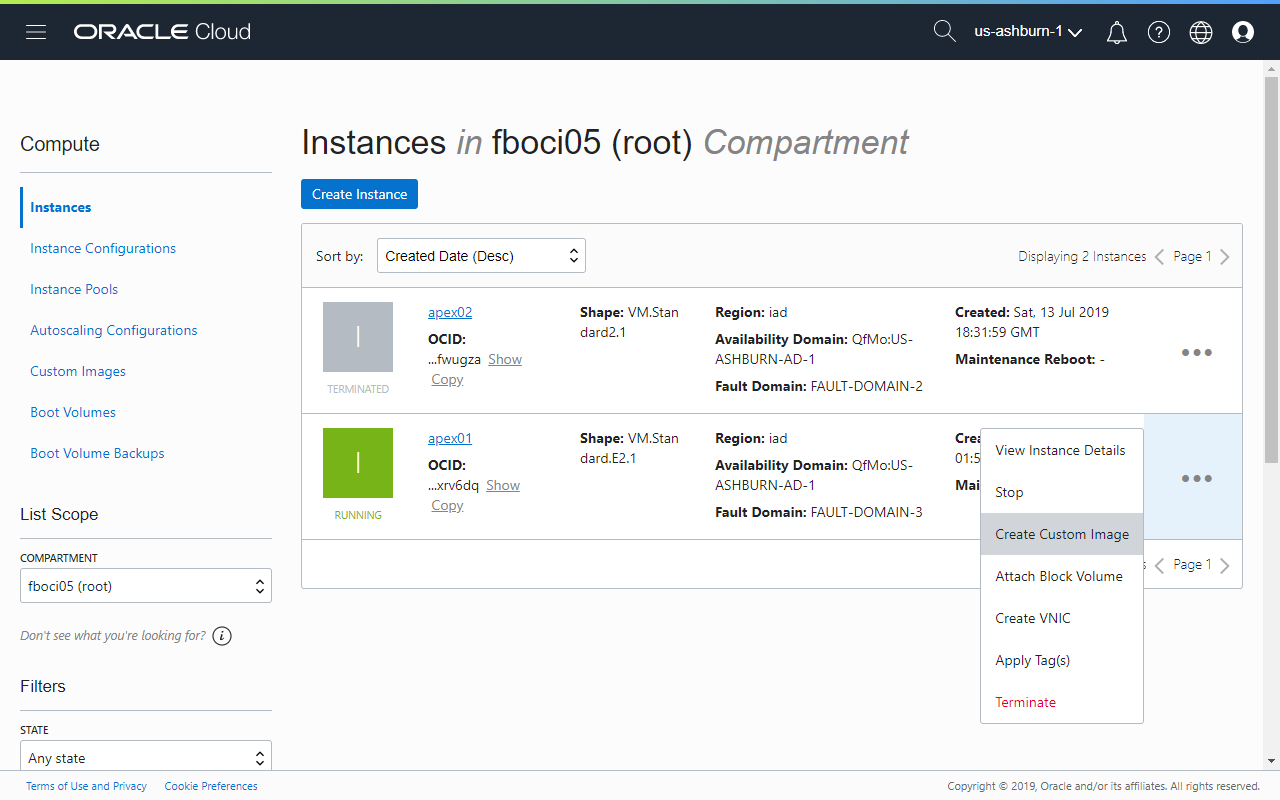
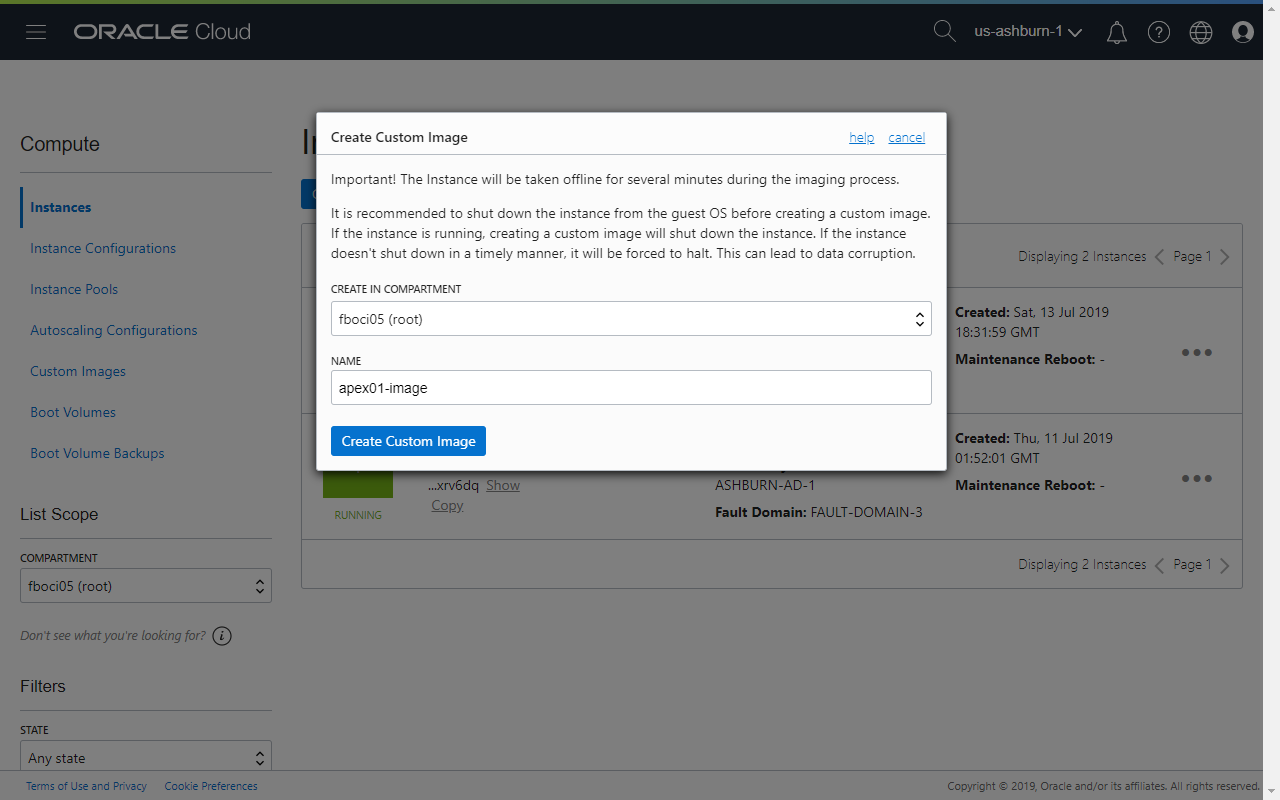
- Select the target compartment, enter a name and then click "Create Custom Image".
- While waiting for the process to be completed, if a new Object Storage Bucket needs to be created, click Object Storage Object Storage.
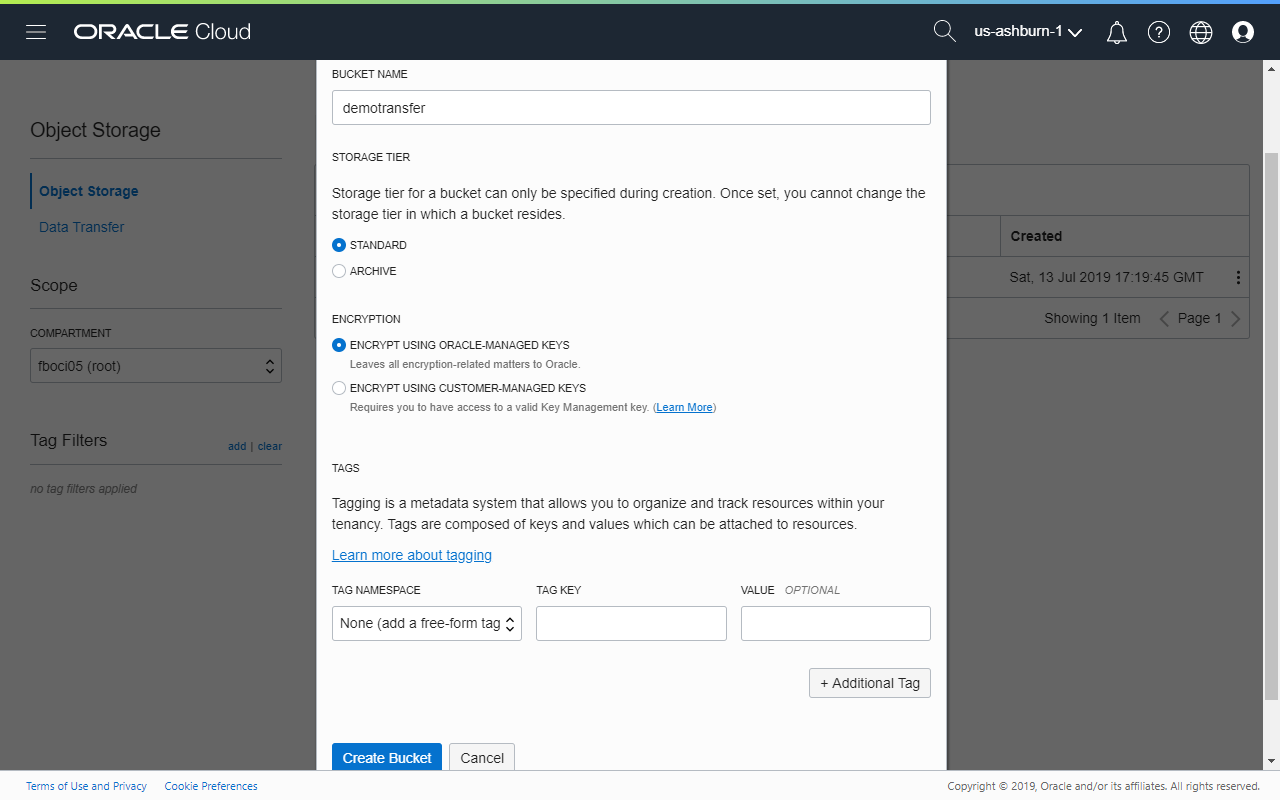
- Enter a Bucket Name, select Standard Storage Tier, use Oracle-managed keys and then click "Create Bucket".
- Click Compute Custom Images. The status should show green and "Available" when the custom image is ready. At this point, the compute instance would have powered back on automatically.
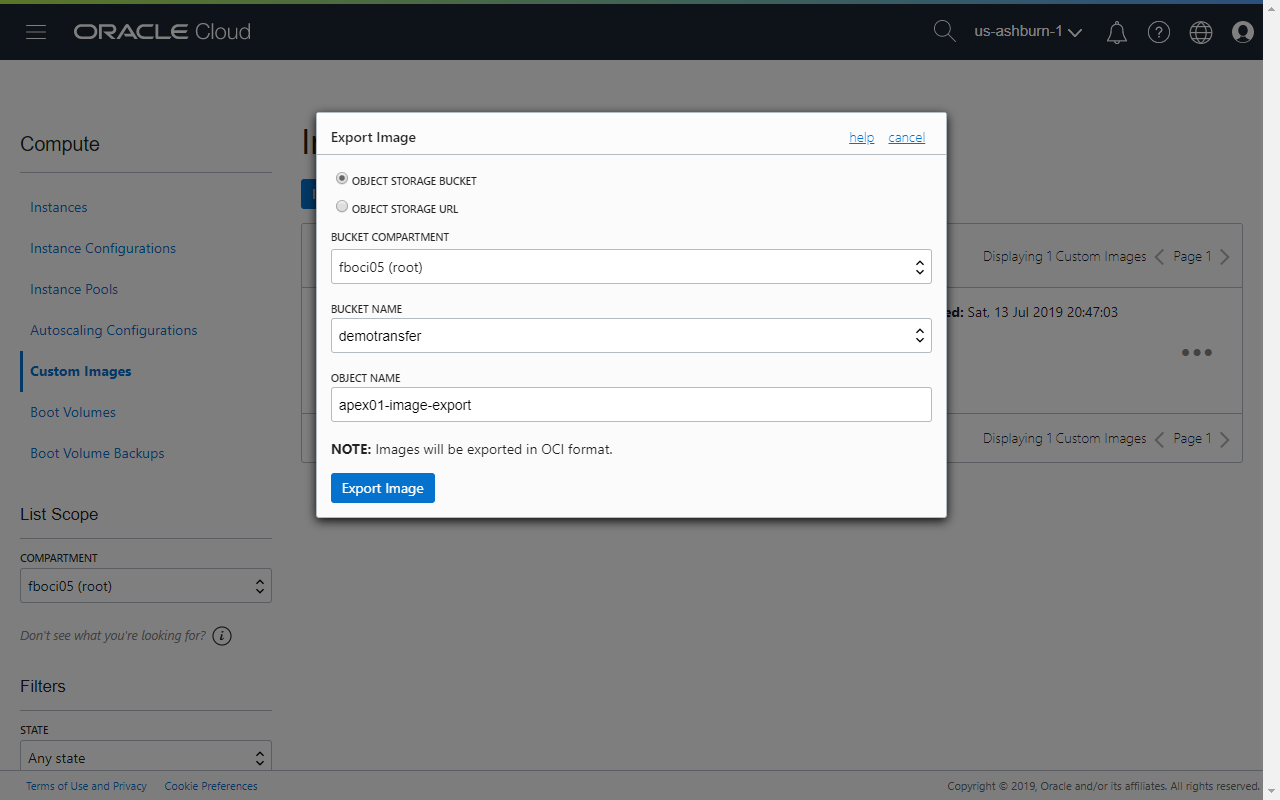
- Place the mouse cursor over the next to the newly created custom image and then click "Export Custom Image".
- Select Object Storage Bucket, the Bucket compartment and name, and then enter a new Object Name. Click "Export Image" when you are ready to proceed.
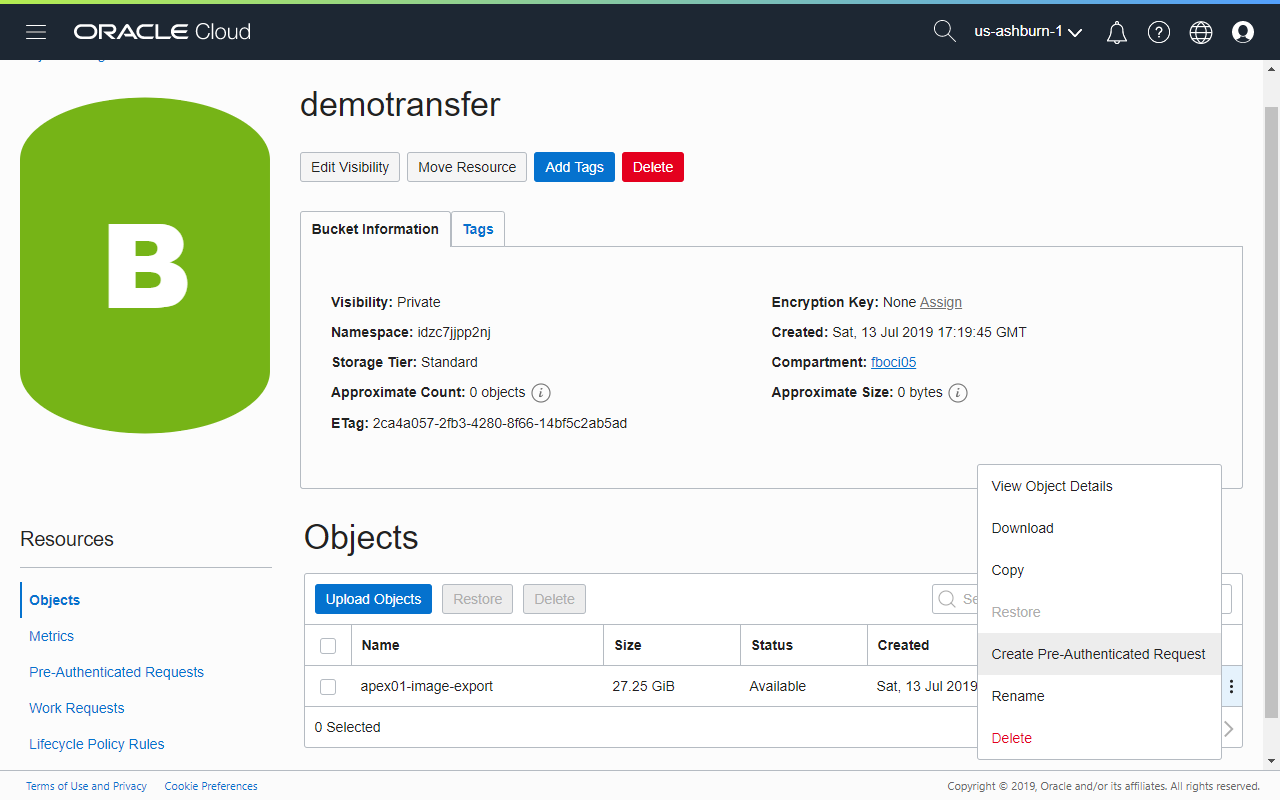
- Exporting the image takes a while to complete. click Object Storage Object Storage and then select the bucket that the image was written to. When it is completed, the object will appear in the Objects table.
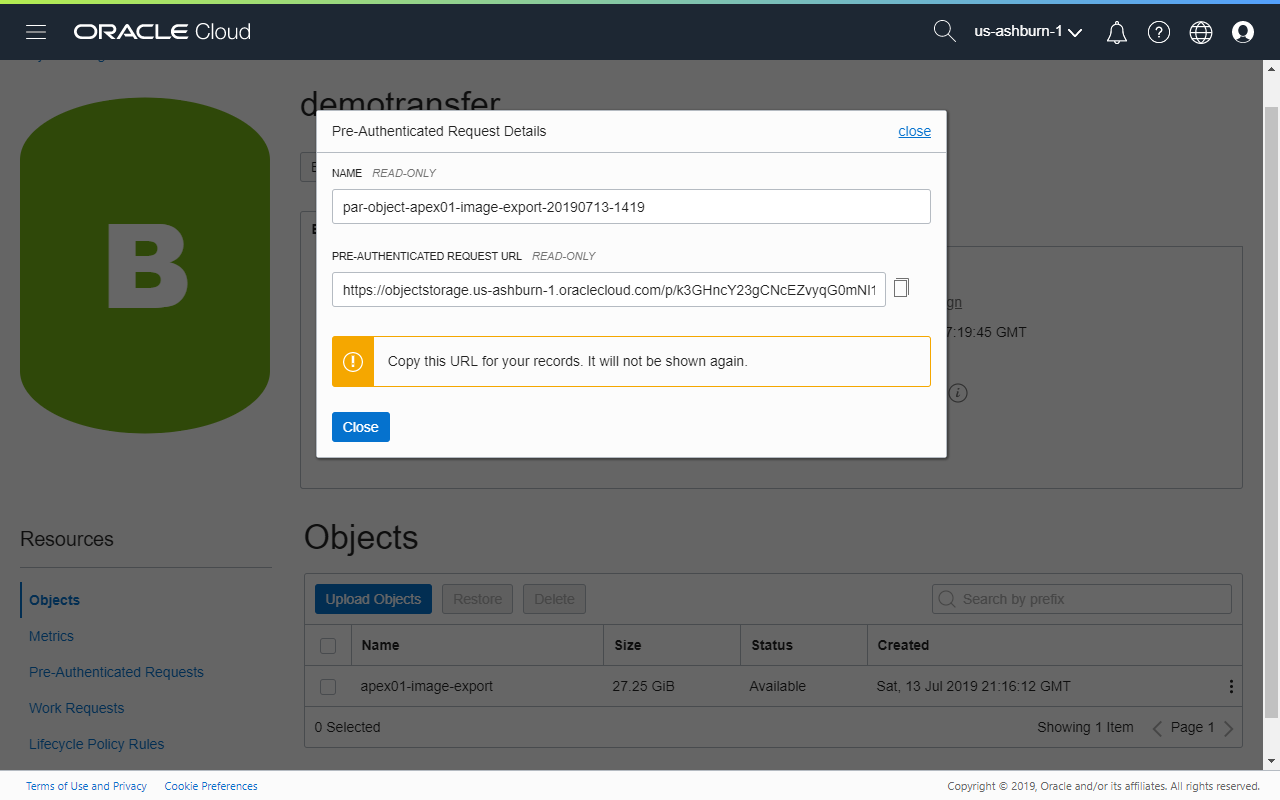
- Place the mouse cursor over the next to the newly created object and click "Create Pre-Authenticated Request".
- Enter the name of the request, select Object for the request target, Permit Read on the Object for Access Type and then specify an expiration date. Click "Create Pre-Authenticated Request" when done.
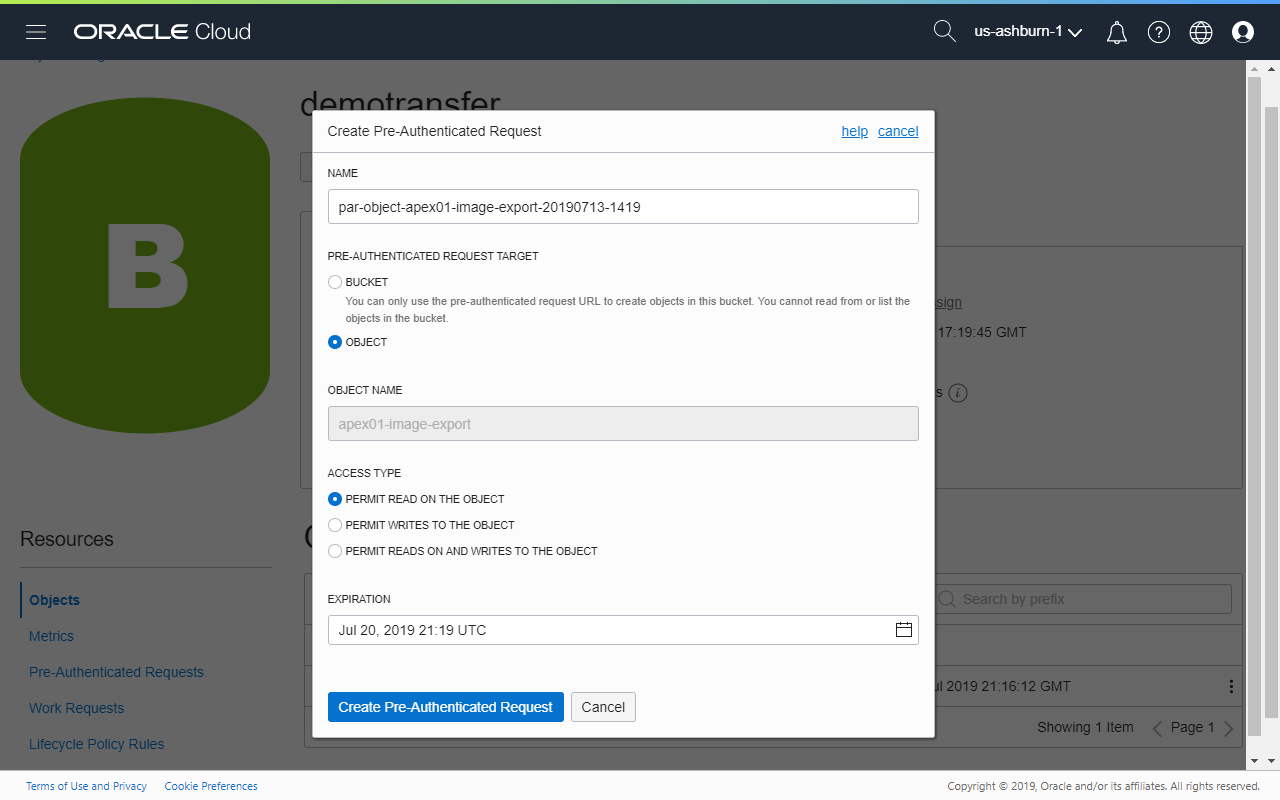
- The next dialog presented contains the Pre-Authenticated Request URL. Copy the link in full. It will be required for the import process.
Import the Image and Create Compute Instance
Next, on the target tenant, create a new compute instance using the imported custom image.
- Click Compute Custom Images.
- Click "Import Image" and enter the following information and then click "Import Image".
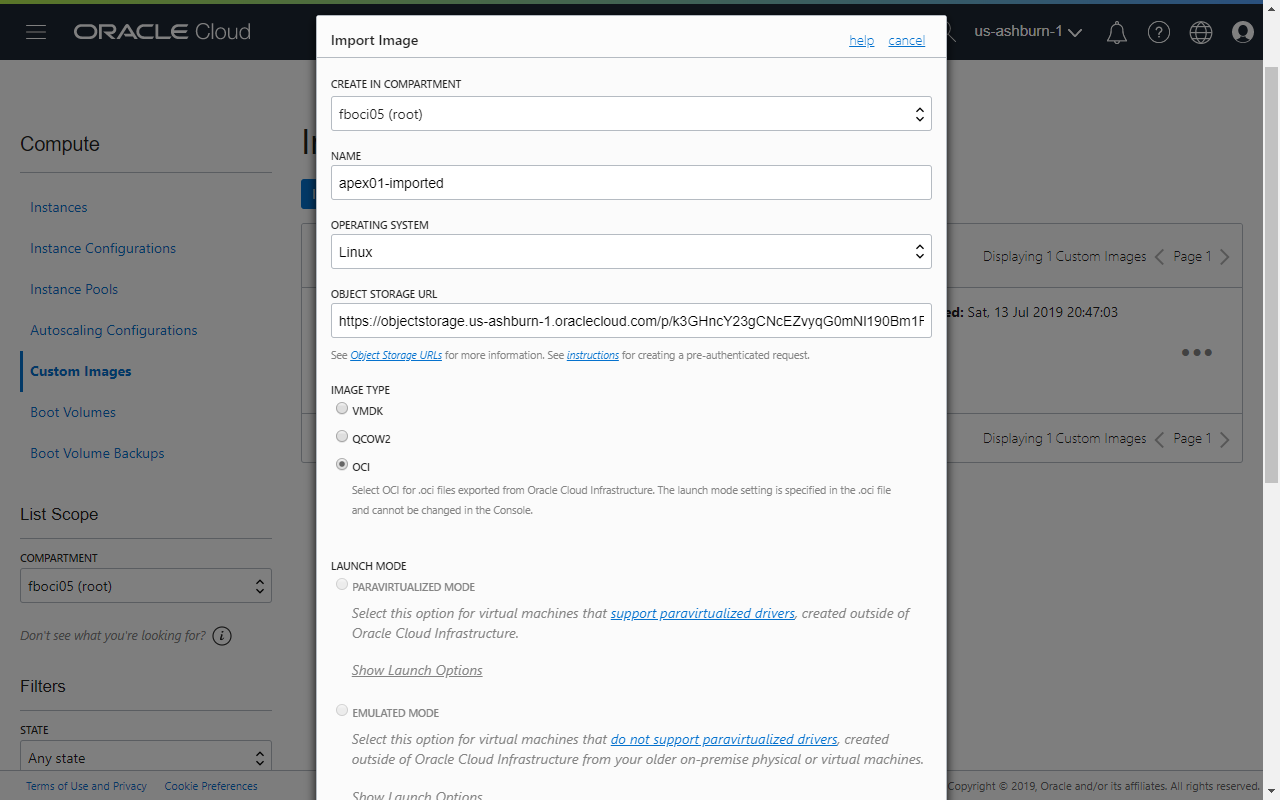
- Compartment to create a new custom image in.
- Name of the new custom image.
- Operating System, in this case, Linux.
- The Object Storage Pre-Authenticated Request URL obtained earlier.
- Select OCI for Image Type.
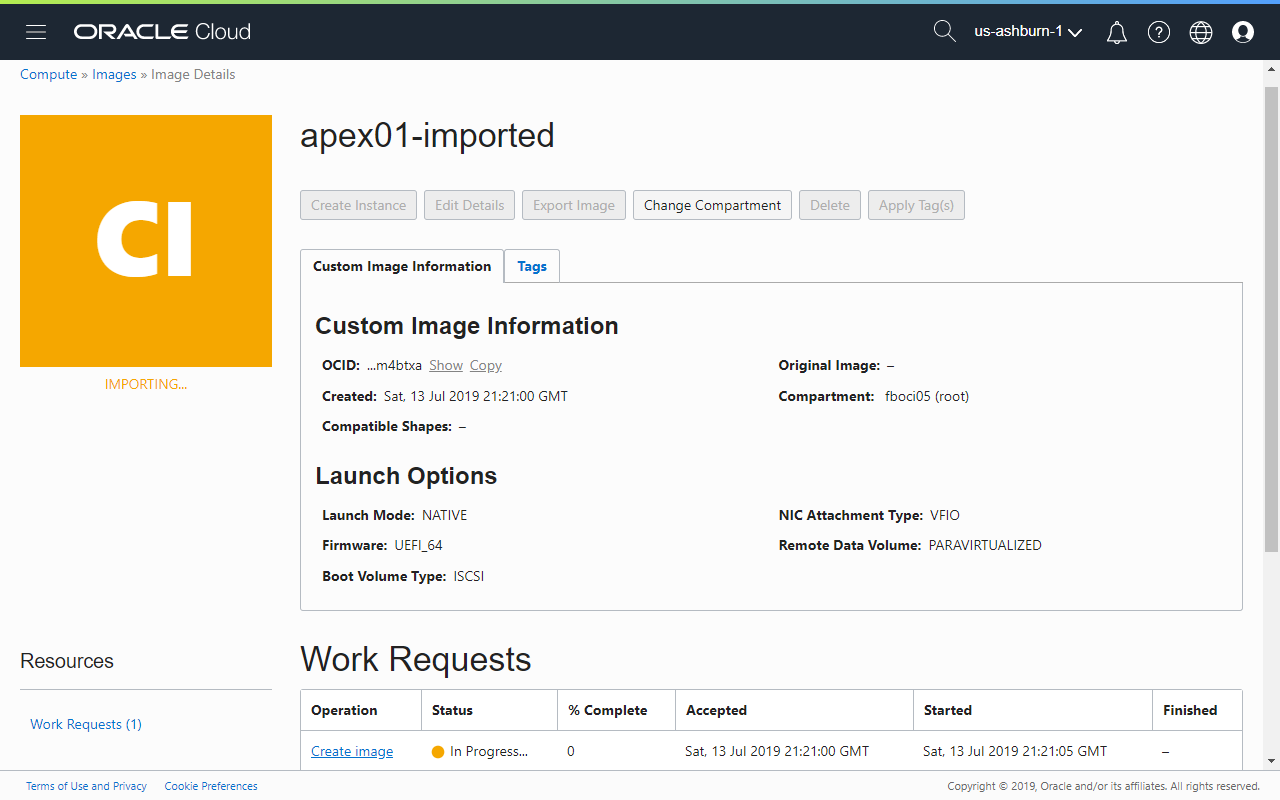
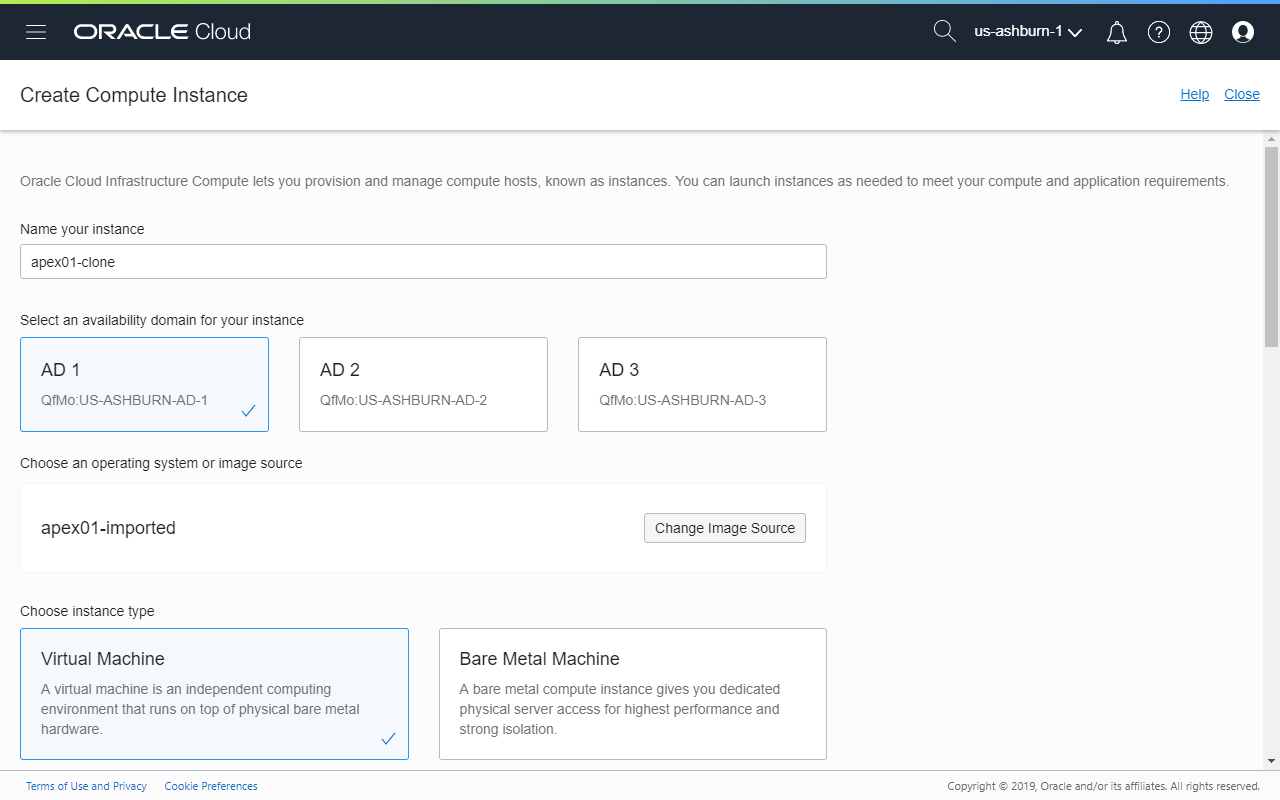
- Importing the image again takes a long time to finish. When it's done, the fastest path to create the instance is to click "Create Instance".
- From here, creating the instance is the same as previously described.
Summary
This looks like a lengthy process, but it's really simple to move your compute instances from one tenant to another. This might come in handy, especially when you've put in quite a bit of effort creating your compute instances during a trial. I'm just saying! .
Photo CreditsPhoto by theyounz License: CC BY-ND 2.0