Easy Data Sharing for Machine Learning Training

Another year has passed me by. Rather than reflect on the year that passed, I'd like to end the year looking forward into 2025. Hopefully, I 'll get to catch some beautiful equatorial lights in my home country Singapore a little more in the coming year. Meanwhile, in my final post for 2024, I'd like to cram in two Oracle Autonomous Database (ADB) features that deserves more limelight and attention.
Goals
In all my years working with data scientists and statisticians, I have not found much success convincing them to take advantage of the Oracle Database's support for embedded execution of R and Python code. More often than not, they will export the data and then load them locally, in-memory, to perform data cleaning, visualization, exploratory data analysis, and machine learning (ML) model training.
More recently, I completed DeepLearning.AI's Data Engineering professional certificate course that gave me a different perspective of how data is served for ML training purposes at the end of well-designed data pipeline. In this final post of 2024, I'd like to demonstrate how we can:
- Create a synthetic training data set for training a machine learning model using Select AI. We will generate a dataset commonly used for training aspiring machine learning engineers, the Iris dataset.
- Create the ADB's Data Share feature through an Oracle APEX application.
- Consume the data share to train a machine learning model in Python.
Generate Synthetic Data
Select AI is a generative AI-based solution for generating SQL statements using metadata from the Oracle Database. It was announced and made available in late 2023. Back then, I had written a short note on how you can get started with this technology with a few simple steps. Since then, there have been a series of enhancements including generating SQL from natural language using the Oracle Cloud Infrastructure (OCI) Generative AI service, and more recently, the ability to generate synthetic data. Synthetic data can be used for simulation and test, but more and more, ML engineers are looking at using them to train models!
The Iris dataset is a simple table containing five key columns. For inputs into the ML model, we have:
- Sepal length
- Sepal width
- Petal length; and
- Petal width
All measurements are in centimetres. And finally, for output, there is a single column that labels the species of Iris for the given measurements.
create table flower (
  flower_id number generated by default on null as identity
  , sepal_length_cm number not null
  , sepal_width_cm number not null
  , petal_length_cm number not null
  , petal_width_cm number not null
  , species varchar2(255) not null
  , constraint flower_pk primary key (flower_id)
)
/
Adding comments is not only a good development practice, but will also help Select AI generate better SQL statements and responses, so let's add some descriptive text to all the columns in the table.
comment on column flower.flower_id is 'The primary identifier that is unique to the record.';
comment on column flower.sepal_length_cm is 'Sepal length measures leaf structures protecting the iris flower bud.';
comment on column flower.sepal_width_cm is 'Sepal width measures the horizontal dimension of iris flower structures.';
comment on column flower.petal_length_cm is 'Petal length measures the vertical dimension of iris flower petals.';
comment on column flower.petal_width_cm is 'Petal width measures the horizontal dimension of iris flower petals.';
comment on column flower.species is 'A flower''s species classifies it within a specific group.';
Next, let's define some important variables.
define CREDENTIAL_NAME = 'MY_AGENT';
define AI_PROFILE_NAME = 'OCI_GENAI_IRIS';
define COMPARTMENT_OCID = 'ocid1.compartment.oc1....';
define MODEL_NAME = 'meta.llama-3.1-405b-instruct';
define SCHEMA_NAME = 'MY_SCHEMA';
define TABLE_NAME = 'FLOWER';
We begin with a name for credential that will be used to access the OCI Generative AI service. If you haven't already done so, then please have a look at the Oracle LiveLabs workshop, Lab 1, tasks 1 to 4, to setup the necessary OCI Identity Access Management (IAM) resources and generate the API key. In lieu of task 5, create an IAM policy using the statement provided in this blog post. Gather the necessary information to populate the following variables:
- USER_OCID
- TENANCY_OCID
- PRIVATE_KEY
- FINGERPRINT
Then, create the credential.
declare
  credential_not_found exception;
  pragma exception_init(credential_not_found, -20004);
begin
  begin
    dbms_cloud.drop_credential('&CREDENTIAL_NAME.');
  exception
    when credential_not_found then
      dbms_output.put_line('Credential not found. No action performed.');
  end;

  dbms_cloud.create_credential (
    credential_name => '&CREDENTIAL_NAME.'
    , user_ocid => '&USER_OCID.'
    , tenancy_ocid => '&TENANCY_OCID.'
    , private_key => '&PRIVATE_KEY.'
    , fingerprint => '&FINGERPRINT.'
  );
end;
/
Next, create the "AI profile".
declare
  profile_not_found exception;
  pragma exception_init(profile_not_found, -20046);
begin
  begin
    dbms_cloud_ai.drop_profile('&AI_PROFILE_NAME.');
  exception
    when profile_not_found then
      dbms_output.put_line('AI profile not found. No action performed.');
  end;

  dbms_cloud_ai.create_profile(
    profile_name => '&AI_PROFILE_NAME.'
    , attributes => json_object(
        key 'provider' value 'oci'
        , key 'model' value '&MODEL_NAME.' -- e.g. meta.llama-3.1-405b-instruct
        , key 'oci_apiformat' value 'GENERIC' -- specify COHERE if using Cohere's models
        , key 'credential_name' value '&CREDENTIAL_NAME.'
        , key 'object_list' value json_array(
            json_object(key 'owner' value '&SCHEMA_NAME.', key 'name' value '&TABLE_NAME.')
        )
        , key 'comments' value 'true' -- include comments.
        , key 'oci_compartment_id' value '&COMPARTMENT_OCID.'
    )
  );
end;
/
That's it! The final step in this section is to generate the synthetic dataset for training your Iris classification model. Change the record_count as needed, but highly recommend starting with a small number.
begin
  dbms_cloud_ai.generate_synthetic_data(
    profile_name => '&AI_PROFILE_NAME.'
    , owner_name => '&SCHEMA_NAME.'
    , object_name => '&TABLE_NAME.'
    , record_count => 5
    , additional_prompt => q'[The species should be a species of Iris, and must
        be prefixed "iris-".]'
  );
end;
/
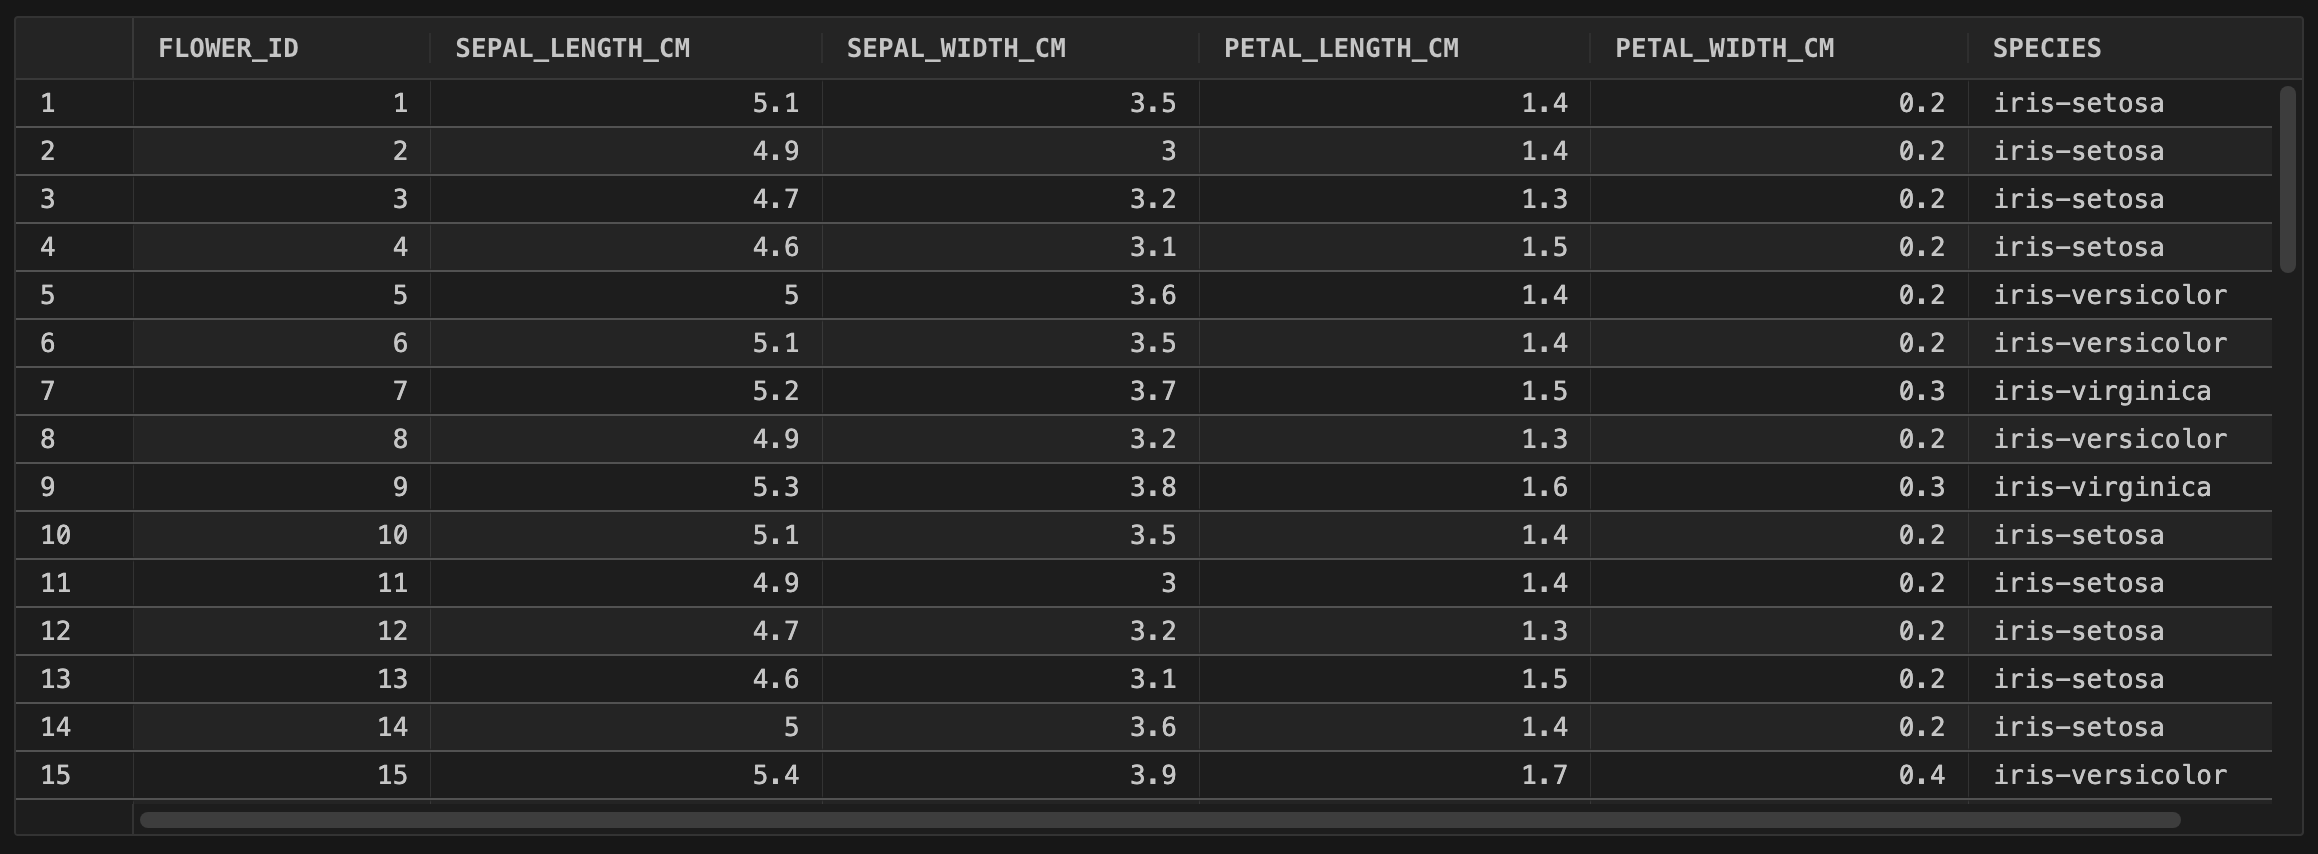
Here's the sample data I generated from one run.
Share Data
The Oracle Data Sharing feature available in ADBs is Oracle's implementation of the Data Sharing protocol. This is an open and vendor-agnostic protocol to facilitate the secure sharing of data between different data or computing platforms. This feature allows the ADB to be either a data producer, consumer, or both.
As a producer, data shares are deposited on the OCI Object Storage in Parquet format, and exposed via pre-authenticated requests (PAR) that are carefully curated and managed in the data share's metadata. Data sharing recipients are created, managed, and granted access to the required shares. To access the data shares, recipients simply need to download a profile, stored in a JSON file containing the necessary security tokens and information. Recipients do not require a database username and password to access the data.
However, the generation and management of data shares and recipients must be performed by a data share-enabled database user. This user may perform these actions through the included Data Studio, or its PL/SQL APIs (DBMS_SHARE). There are two great Oracle LiveLabs workshop that are worth checking out to get started:
- Implement Data Sharing with ADB Data Studio
- Implement Data Sharing with PL/SQL in Autonomous Database
Get Ready
As an ADB administrator, here's what's required to allow a data scientists to create data shares:
- Create a database user (share provider).
- Grant
CONNECT,RESOURCE,DWROLE, andUNLIMITED TABLESPACEto the share provider. - REST-enable the share provider.
- Enable data sharing for the share provider using the subprogramme
DBMS_SHARE.ENABLE_SCHEMA.
Here's script to assist you if required. Note, however, that I skipped creating the user since it already exists.
define SCHEMA_NAME = 'MY_SCHEMA';
grant connect, resource, dwrole to &SCHEMA_NAME.;
grant unlimited tablespace to &SCHEMA_NAME.;

alter user &SCHEMA_NAME. default role all;

begin
  ords_admin.enable_schema(
    p_enabled => true
    , p_schema => '&SCHEMA_NAME.'
    , p_url_mapping_type => 'BASE_PATH'
    , p_url_mapping_pattern => lower('&SCHEMA_NAME.')
    , p_auto_rest_auth=> true
  );

  dbms_share.enable_schema(
    schema_name => '&SCHEMA_NAME.'
    , enabled => true
  );
  commit;
end;
/
NOTE
Be aware that it is possible to share data objects from another database schemas, but the necessary privileges must be provided to the share provider's schema.
Next, some additional OCI resources are required.
- Create or choose a compartment, e.g., MyCompartment.
- Create a bucket in the designated compartment, e.g., my-data-share.
- Create IAM group DataShareStorageManagers and assign the user to this group.
- Create IAM policy DataShareStoragePolicy and add the following statements:
allow group 'Default'/'DataShareStorageManagers' to read buckets in compartment MyCompartment
allow group 'Default'/'DataShareStorageManagers' to manage objects in compartment MyCompartment where any{ target.bucket.name='my-data-share'}
allow group 'Default'/'DataShareStorageManagers' to manage buckets in compartment MyCompartment where all { any{ target.bucket.name='my-data-share' }, request.permission='PAR_MANAGE'}
After these OCI resources have been created, login to the database as the share provider user to create a storage link for data sharing. Begin by setting a few additional variables.
define STORAGE_LINK_NAME = 'DATASHARE_STORAGE_LINK'
define OBJECT_STORAGE_BUCKET_URI = 'https://mynamespace.objectstorage.us-phoenix-1.oci.customer-oci.com/n/mynamespace/b/my-data-share/o/'
Then, create the storage link.
begin
  dbms_share.create_cloud_storage_link(
    storage_link_name => '&STORAGE_LINK_NAME.'
    , uri => '&OBJECT_STORAGE_BUCKET_URI.'
  );

  dbms_share.set_storage_credential(
    storage_link_name => '&STORAGE_LINK_NAME.'
    , credential_name => '&CREDENTIAL_NAME.'
  );
end;
/
You will want to test that the storage link is valid using the following instructions:
declare
  l_validation_results varchar2(4000);
begin
  dbms_share.validate_share_storage(
    '&STORAGE_LINK_NAME.'
    , l_validation_results
  );
  sys.dbms_output.put_line(l_validation_results);
exception
  when others
  then
    sys.dbms_output.put_line(sqlerrm);
    sys.dbms_output.put_line(l_validation_results);
end;
/
If everything checks out, the following output will be displayed:
{"READ":"PASSSED","WRITE":"PASSSED","CREATE_PAR":"PASSSED","DELETE_PAR":"PASSSED","DELETE":"PASSSED"}
Creating a Share
As mentioned earlier, data shares, recipients, and access rights can be created and managed either through Data Studio or the DBMS_SHARE PL/SQL APIs. However, these must be performed as the share provider's schema. Here, we will manage these artifacts through an Oracle APEX application instead. The application's parsing schema is set to use the share provider's schema, and it will act on behalf of the application user to create and manage the data share artifacts.
I won't go into too much details on how the application was built, but here's a summary that outlines the critical components.
- A post-authentication process checks if a data share recipient for the user has already been created, and if not, create one.
- Application users start by creating data shares. Since the share names must be unique within the share provider's schema, the share name will always be prefixed with the application username, i.e., the
APP_USERvalue separated with an underscore. - Tables and views that the share provider's schema has access to can be added to a data share.
- Application users may publish and unpublish data shares as needed.
Create an authorization scheme Is a Data Share Recipient to check if the user has been added as a data share recipient using the query:
select null
from user_share_recipients
where recipient_name = :APP_USER
Create an application process Create Data Share Recipient that runs after a user logins in successfully, and executes the PL/SQL code below.
dbms_share.create_share_recipient(
  recipient_name => :APP_USER
  , email => apex_util.get_email(:APP_USER)
);
The routine only executes if the user is not authorized (not yet enrolled as a data share recipient).
On the home page, a button is created for the user to download their delta profile. This button redirects to the URL that is set in a hidden page item. The URL is generated using the DBMS_SHARE.GET_ACTIVATION_LINK as show in the code below.
return
  replace(
    dbms_share.get_activation_link(
      recipient_name => :APP_USER
      , base_endpoint => 'https://' || owa_util.get_cgi_env('HTTP_HOST') || '/ords/'
    )
    , 'ords/_adpshr'
    , 'ords/' || lower(:OWNER) || '/_adpshr'
  )
;
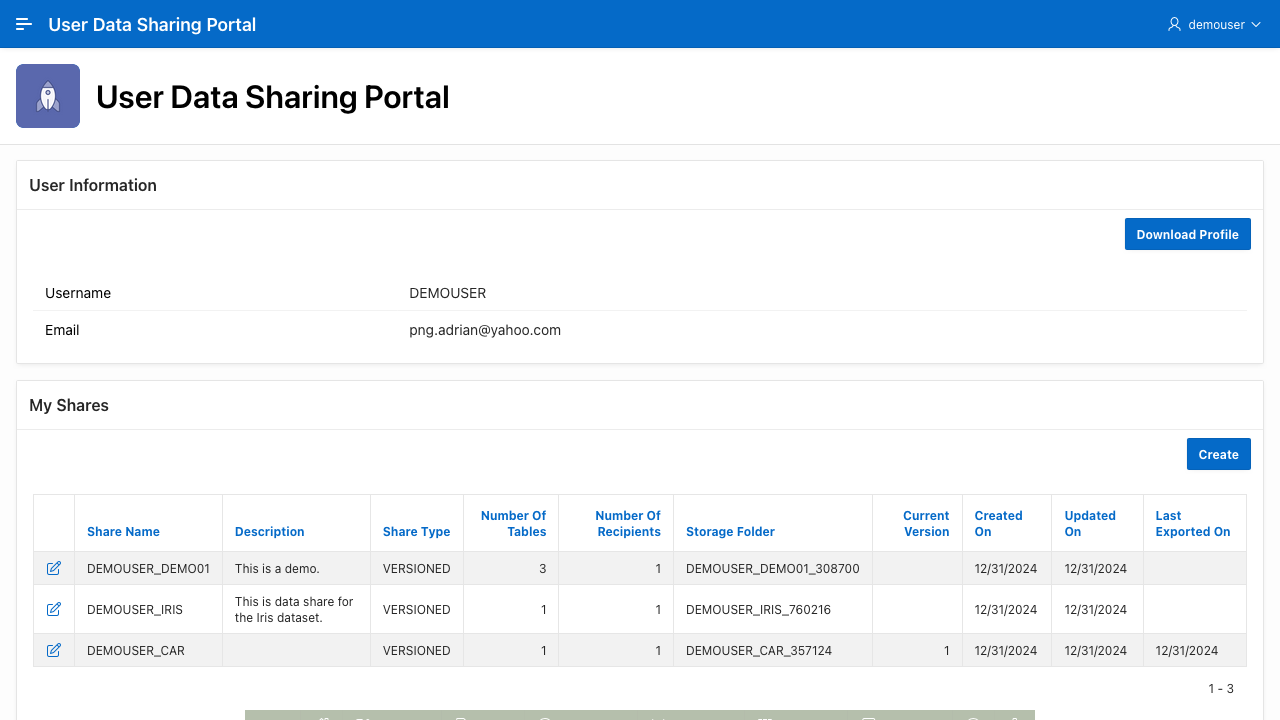
The homepage also displays the list of shares that the user has access to.
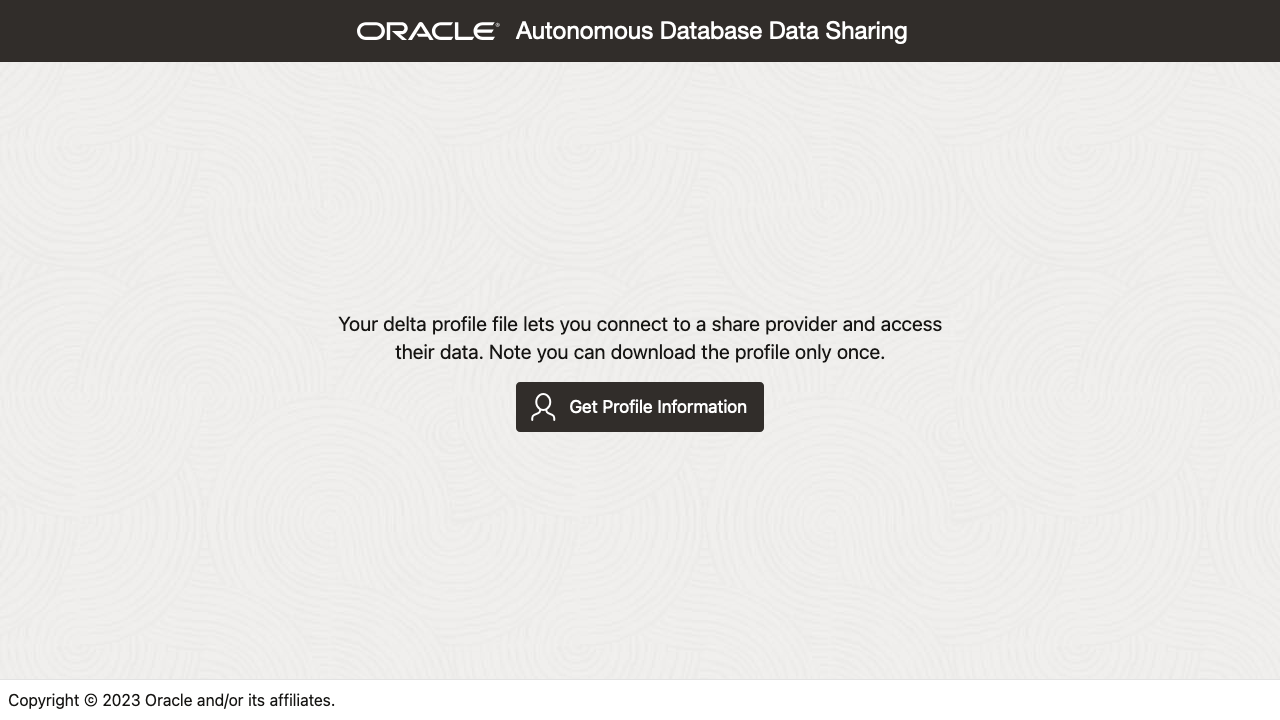
Following through the link brings you to a separate application running on the ADB that lets you then download a JSON file containing the delta profile.
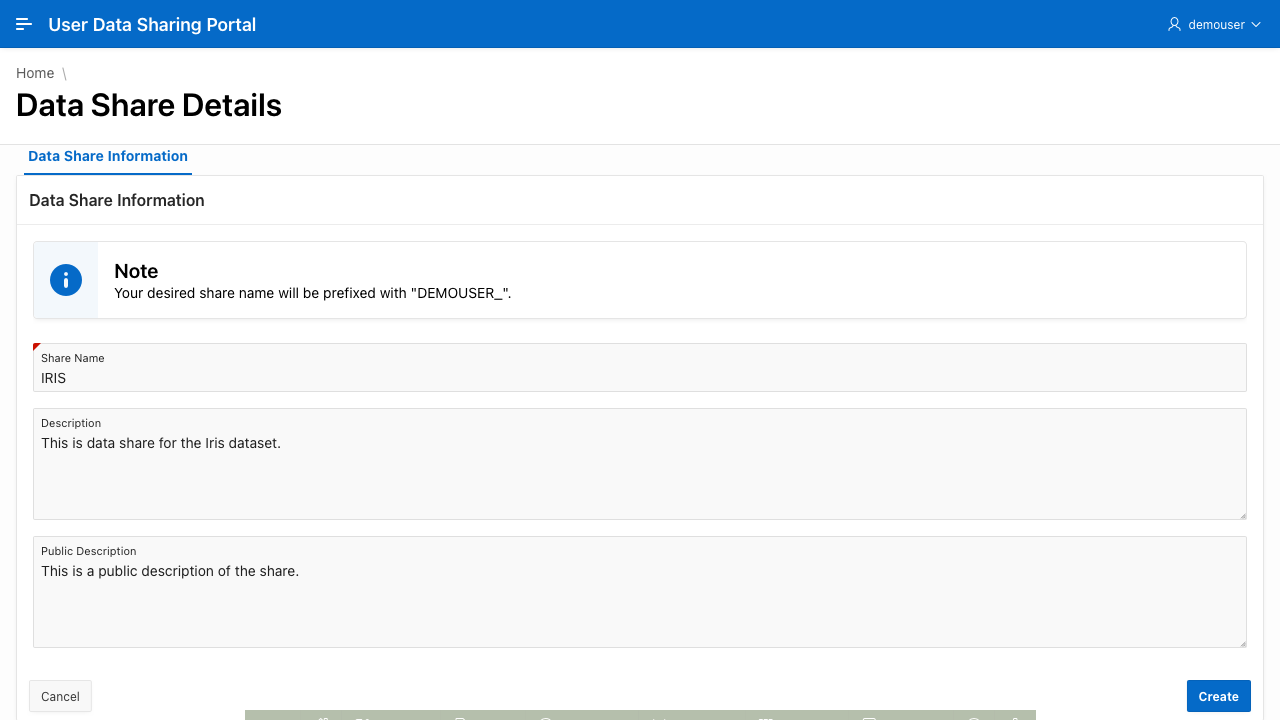
Clicking the Create button leads to page where the user may specify the share name and descriptions.
The data share is created using the DBMS_SHARE.CREATE_SHARE PL/SQL API. After it has been created, the user/recipient is then granted to access to the share by default.
declare
  c_prefix constant varchar2(30) := :APP_USER || '_';
  l_share_name user_shares.share_name%type;
begin
  -- Set the SHARE_NAME using the prefix for uniqueness.
  l_share_name :=
    case
      when regexp_like(:P2_SHARE_NAME, '^' || c_prefix)
        then :P2_SHARE_NAME
      else
        c_prefix || :P2_SHARE_NAME
    end;

  -- Create the data share.
  begin
    dbms_share.create_share(
      share_name => l_share_name
      , storage_link_name => :STORAGE_LINK_NAME
      , description => :P2_DESCRIPTION
      , public_description => :P2_PUBLIC_DESCRIPTION
    );
  exception
    when others then
      apex_debug.error(
        p_message => SQLERRM
        , p0 => 'CREATE_DATA_SHARE'
        , p1 => l_share_name
      );
      raise_application_error(-20001, 'Failed to create share.');
  end;

  -- Assign the user to the share.
  begin
    dbms_share.grant_to_recipient(
      share_name => l_share_name
      , recipient_name => :APP_USER
    );
  exception
    when others then
      apex_debug.error(
        p_message => SQLERRM
        , p0 => 'ADD_RECIPIENT_TO_DATA_SHARE'
        , p1 => l_share_name
      );
      raise_application_error(-20002, 'Failed to add user to data share.');
  end;

  -- Retrieve the new SHARE_ID
  select share_id into :P2_SHARE_ID
  from user_shares
  where share_name = l_share_name;
end;
Once a data share has been created, the user may then add tables to the share. The user only needs to select the desired table, and optionally set the shared schema and table names. The latter two variables are used when referencing the table in the data share client.
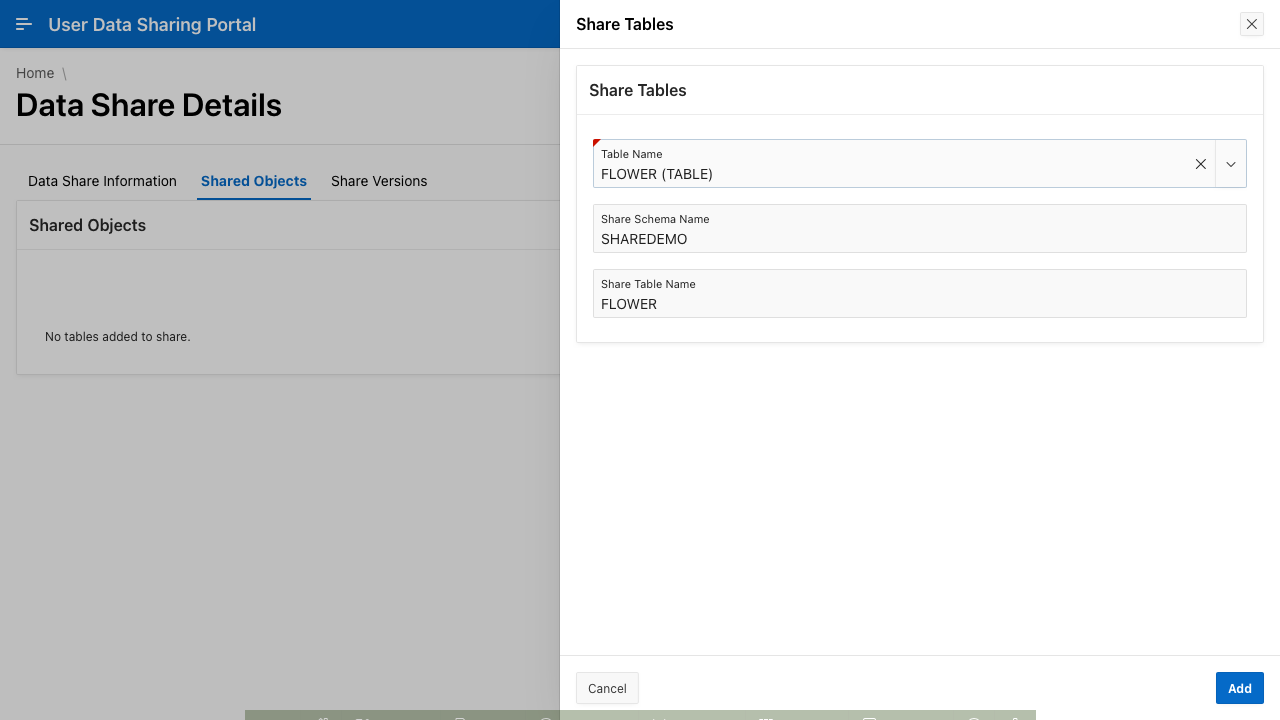
Clicking the button Add triggers a page submission process that adds the table to the data share using the DBMS_SHARE.ADD_TO_SHARE subprogramme as shown in the code below.
declare
  l_data_share user_shares%rowtype;
begin
  select * into l_data_share
  from user_shares
  where share_id = :P3_SHARE_ID;

  dbms_share.add_to_share(
    share_name => l_data_share.share_name
    , table_name => :P3_TABLE_NAME
    , share_schema_name => :P3_SHARE_SCHEMA_NAME
    , share_table_name => :P3_SHARE_TABLE_NAME
  );
end;
Once tables have been added, it would then make sense to publish the share. In a separate tab, a report shows the list of share versions using the view USER_SHARE_VERSIONS that are currently available for the data share. As this is a freshly created data share, no rows are returned.

Clicking the button Publish triggers a dynamic action that then executes the server side code below.
declare
  l_data_share user_shares%rowtype;
begin
  select * into l_data_share
  from user_shares
  where share_id = :P2_SHARE_ID;

  dbms_share.publish_share(
    share_name => l_data_share.share_name
  );
end;
There are two subprogrammes for publishing shares, DBMS_SHARE.PUBLISH_SHARE and DBMS_SHARE.PUBLISH_SHARE_WAIT. As the names imply, one is asynchronous, and the other, synchronous. For a web application, I prefer to use the asynchronous method as the publishing of a share can take a while. It would be better for the user to return later to check on the publishing status. Once published, the data share is ready to be consumed by a client!
Consume Data for ML Training
In this final section, we look at consuming the data share using Python. The Conda environment file below provides basic packages needed to access the data using the delta sharing protocol.
name: delta-share-client
dependencies:
  - python>=3.12
  - pip
  - pip:
    - delta-sharing>=1.3.1
To demonstrate how simple it is to load data from a data share, here are four lines (could be less) of code that is need to load the synthetically generate Iris dataset into a pandas data frame.
import delta_sharing
share_file_path = '/path/to/delta_share_profile.json'
client = delta_sharing.SharingClient(share_file_path)
df = delta_sharing.load_as_pandas(f'{share_file_path}#DEMOUSER_IRIS.SHAREDEMO.FLOWER')
NOTE
I ran out of time and also issues with my ADB instance. I will continue in a second part on how we can then use the loaded pandas to train a classifier in Python. Stay tuned!
Closing
More realistic synthetic data generation is not only a great tool for running simulations and testing, but also has the potential to help train or fine-tune ML models. However, I am still a little hesitant to consider model training with synthetic data the best option. Nothing beats real and high quality data for training.
I am hopeful that the ADB data sharing feature provides the opportunity for enterprises to create data marts that can help fuel innovation and better use of data that is otherwise already collected. For MLOps, it can be a great tool manage data lineage by updating and versioning datasets as new data is made available in the system. Very promising!
Finally, I'd like to take the opportunity to thank you, the readers, for visiting my blogs, learning with my Oracle LiveLabs workshop contributions, and attending my presentations at various conferences this year. I hope the content and information that I have shared in the past year has been helpful, and relevant to your career and aspirations. If not, I beg your forgiveness, and promise to do better tomorrow!
HAPPY NEW YEAR! 🎆 🍾
Credits
