ARM Your APEX Instance

In September 2020, Oracle first announced that it was working with Ampere Computing to provide ARM-based chips for its Compute instance offering on the Oracle Cloud Infrastructure. They have delivered!
ARM chips are found in many low-powered devices like smartphones, single-board computers, and IoT devices. So, if you are an Oracle Application Express (APEX) developer, you might be wondering, "What's in it for me?" Well, remember we talked about running a customer-managed Oracle REST Data Services (ORDS) instance for an Oracle Autonomous Database?
The OCI isn't the first platform to offer ARM-based compute resources. You will find a similar offering from AWS with their Graviton processors. Instead of custom-designing a processor, Oracle opted to use the Ampere Altra Processor that has 80 cores running at a maximum frequency of 3.3 Ghz. Check out AnandTech's review of the chip.
If you are interested to read about the performance comparisons between the ARM and x86 architectures, please check out this report. What I understand is that for hosting web applications that are typically single threaded, ARM chips offer a better cost-to-performance ratio, not to mention, lower power consumption. Each processing core is also generally cheaper than its competitors, thus allowing cloud vendors to provision them at cheaper rates. We saw this happening when Oracle first launched the AMD EPYC-based compute shapes that were cheaper than Intel's at that time.
Let's Get Started
As with other processor types, OCI customers can opt to provision virtual machines or bare metal machines:
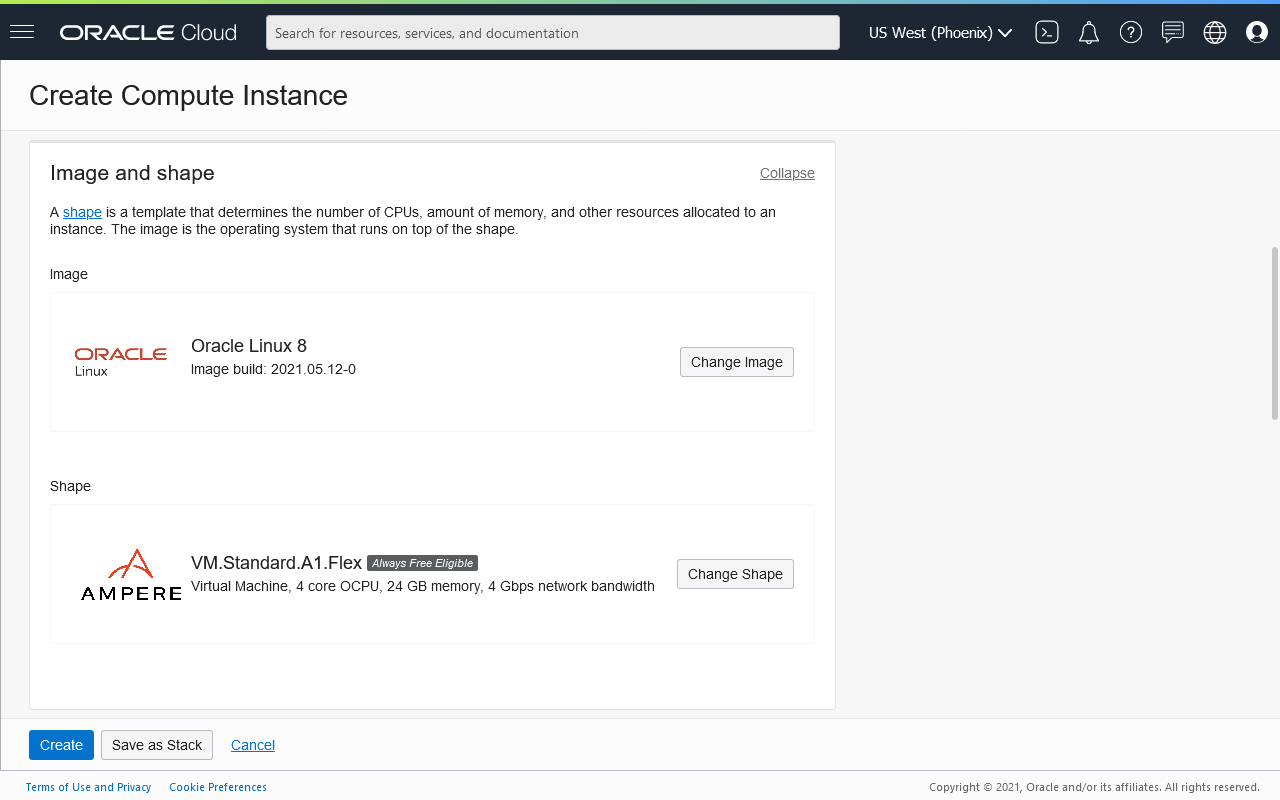
- VM.Standard.A1.Flex. Like the AMD EPYC Flex shapes, users can create instances with a flexible number of OCPUs and memory. Servers can be provisioned with 1 to 80 OCPUs, and 1 to 512 GB memory.
- BM.Standard.A1.160. Only one shape for bare metal machines is available at this time. It comes with 160 OCPUs and 1 TB of memory.
Oracle has also provided a generous Oracle Cloud Free Tier allotment of Ampere compute instance. Users can provision an Always Free compute instance with up to 4 OCPUs and 24 GB of memory (see the press release). The Always Free block volume allotment has also increased from 100 to 200 GB. Yes, there are no charges and no end dates for these resources. I will use this to host the customer-managed ORDS instance. Beyond that, according to the cost estimator, each additional OCPU will cost you only $10 per month, and $1 for every gigabyte of memory!
Note. These A1 cores are single-threaded. In x86-based shapes, 1 OCPU has 2 virtual CPUs.

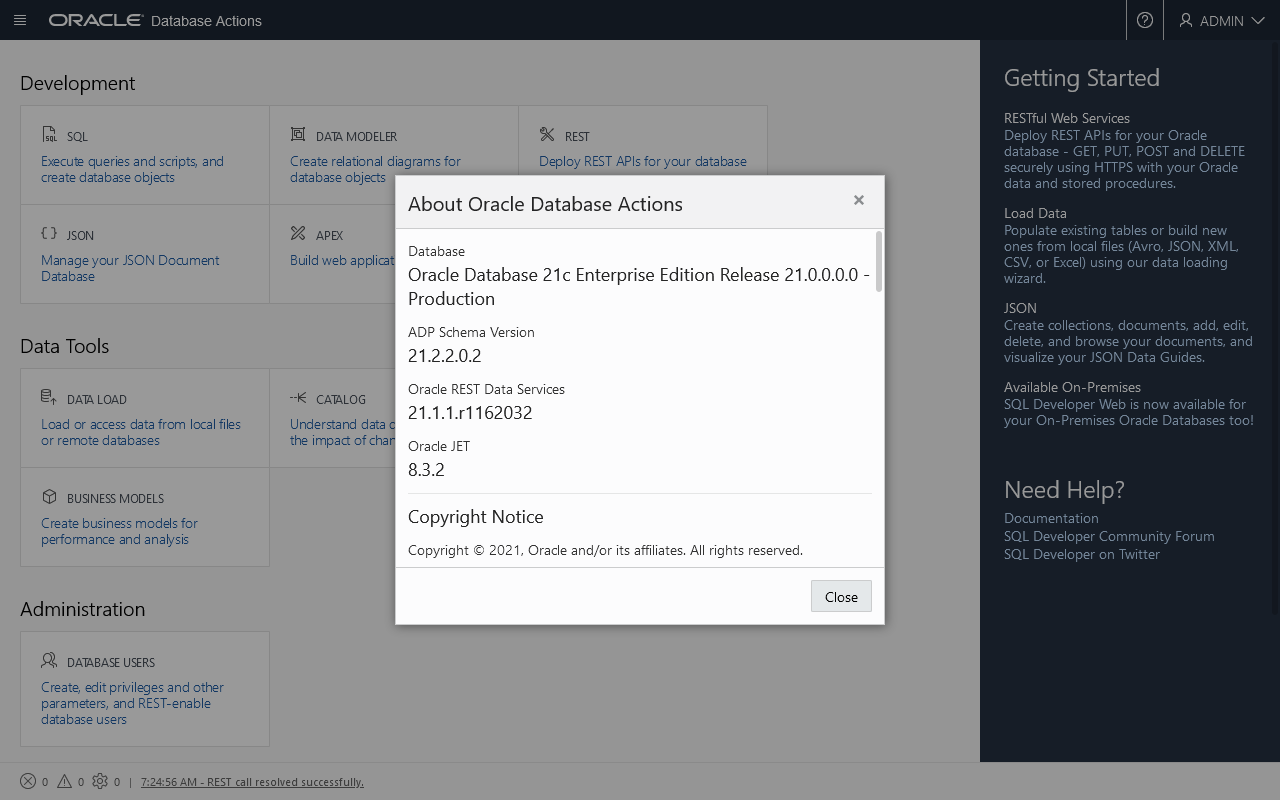
The downside of moving to an ARM chip is the availability of software support. For example, though you can install the Oracle Instant Client on an ARM system, Oracle has not released AArch64 database binaries. Fortunately for us, there already exists a Java port for this architecture, so there should be no issues deploying ORDS or running it standalone. However, at the time of writing, the ORDS package is not available to install through the Oracle Yum repositories. I will instead deploy ORDS on a Tomcat server using Podman. The official Docker image that I will use can be found here. Take note that you will have to ensure that you deploy a version of ORDS that's compatible to what the ADB is using.

After provisioning the Oracle Enterprise Linux 8 server, login as the user opc and install the following software:
- OCI Command Line Interface (CLI)
- Podman
- [Optional] Support for emulating Docker CLI using podman
sudo dnf install python36-oci-cli podman podman-docker
Create the base directory where we will deploy our files to.
BASE_PATH=/opt/podman/ords && \
mkdir -p $BASE_PATH
Stage the following installer files in the directory $BASE_PATH/files:
apex_20.2.zipp32006852_2020_Generic.zipords-21.1.1.116.2032.zip
Note: At the time of writing, the ADB is still running APEX 20.2 with the latest Patch Set Bundle. To download the patch, you will require a qualified support contract.
Create the following Dockerfile in the directory specified by the environment variable BASE_PATH:
FROM tomcat:9.0-jdk8-openjdk-slim

ARG INSTALL_FILES_DIR=/tmp
ARG ORDS_HOME=/opt/oracle/ords
ARG ORDS_CONFIG_DIR=$ORDS_HOME/conf
ARG ORDS_INSTALL_FILE=ords-21.1.1.116.2032.zip

COPY files/$ORDS_INSTALL_FILE $INSTALL_FILES_DIR/

RUN apt update -y && \
  apt install -y unzip && \
  mkdir -p $ORDS_HOME $ORDS_CONFIG_DIR && \
  unzip $INSTALL_FILES_DIR/$ORDS_INSTALL_FILE -d $ORDS_HOME && \
  java -jar $ORDS_HOME/ords.war configdir $ORDS_CONFIG_DIR && \
  cp $ORDS_HOME/ords.war /usr/local/tomcat/webapps/ && \
  sed -i -r 's/Connector port=\"8080\" protocol=\"HTTP\/1\.1\"/& scheme=\"https\"/' \
    /usr/local/tomcat/conf/server.xml && \
  rm -f $INSTALL_FILES_DIR/$ORDS_INSTALL_FILE && \
  apt clean -y
Alternatively, run the following Bash script to create the Dockerfile:
cd $BASE_PATH && \
cat << EOF > Dockerfile
FROM tomcat:9.0-jdk8-openjdk-slim

ARG INSTALL_FILES_DIR=/tmp
ARG ORDS_HOME=/opt/oracle/ords
ARG ORDS_CONFIG_DIR=\$ORDS_HOME/conf
ARG ORDS_INSTALL_FILE=ords-21.1.1.116.2032.zip

COPY files/\$ORDS_INSTALL_FILE \$INSTALL_FILES_DIR/

RUN apt update -y && \\
  apt install -y unzip && \\
  mkdir -p \$ORDS_HOME \$ORDS_CONFIG_DIR && \\
  unzip \$INSTALL_FILES_DIR/\$ORDS_INSTALL_FILE -d \$ORDS_HOME && \\
  java -jar \$ORDS_HOME/ords.war configdir \$ORDS_CONFIG_DIR && \\
  cp \$ORDS_HOME/ords.war /usr/local/tomcat/webapps/ && \\
  sed -i -r 's/Connector port=\\"8080\\" protocol=\\"HTTP\/1\\.1\\"/& scheme=\\"https\\"/' \\
    /usr/local/tomcat/conf/server.xml && \\
  rm -f \$INSTALL_FILES_DIR/\$ORDS_INSTALL_FILE && \\
  apt clean -y
EOF
Build the container image.
cd $BASE_PATH && \
podman build -t ords .
Set the following environment variables based on your tenancy, data region, and ADB:
ADB_OCID=ocid1.autonomousdatabase.oc1.phx.abyh...4pggq
ADB_NAME=myadb
ORDS_USER=ORDS_PUBLIC_USER2
ORDS_PASSWORD="avoidsimplepasswords"
WALLET_PASSWORD="atalltimes"
SERVICE_NAME=${ADB_NAME}_low
WALLET_FILE_PATH=/tmp/wallet_${ADB_NAME}.zip
ORDS_CONFIG_DIR=$BASE_PATH/conf
Use the OCI CLI to generate the required ADB wallet, and then create the base64-encoded string needed for configuring ORDS to access the database.
export OCI_CLI_AUTH=instance_principal && \
oci db autonomous-database generate-wallet \
  --autonomous-database-id $ADB_OCID \
  --file $WALLET_FILE_PATH \
  --password WALLET_PASSWORD && \
WALLET_BASE64=`base64 -w 0 $WALLET_FILE_PATH` && \
rm -f ${WALLET_FILE_PATH}
Create the database user named in the environment variable ORDS_USER and asssign the necessary privileges. Refer to the section User Accounts in the previous post if you require help. Then create the ORDS configuration files:
mkdir -p $ORDS_CONFIG_DIR/ords/conf && \
cat << EOF > $ORDS_CONFIG_DIR/ords/conf/apex_pu.xml
<?xml version="1.0" encoding="UTF-8" standalone="no"?>
<!DOCTYPE properties SYSTEM "http://java.sun.com/dtd/properties.dtd">
<properties>
  <entry key="db.username">$ORDS_USER</entry>
  <entry key="db.password">!$ORDS_PASSWORD</entry>
  <entry key="db.wallet.zip.service">$SERVICE_NAME</entry>
  <entry key="db.wallet.zip"><![CDATA[$WALLET_BASE64]]></entry>
</properties>
EOF

cat << EOF > $ORDS_CONFIG_DIR/ords/defaults.xml
<?xml version="1.0" encoding="UTF-8" standalone="no"?>
<!DOCTYPE properties SYSTEM "http://java.sun.com/dtd/properties.dtd">
<properties>
  <entry key="plsql.gateway.enabled">true</entry>
  <entry key="jdbc.InitialLimit">5</entry>
  <entry key="jdbc.MaxLimit">10</entry>
</properties>
EOF
Prepare to stage the APEX images files by first setting the following environment variables:
INSTALL_FILES_DIR=$BASE_DIR/files
APEX_INSTALL_FILE=apex_20.2.zip
APEX_VERSION=20.2.0.00.20
APEX_IMAGES_DIR=$BASE_PATH/apex_images
Execute the snippet below to extract the necessary files from the APEX installation file and deploy them to the Tomcat container.
mkdir -p $APEX_IMAGES_DIR && \
touch $APEX_IMAGES_DIR/index.html && \
unzip $INSTALL_FILES_DIR/$APEX_INSTALL_FILE "apex/images/*" -d /tmp/ && \
mv /tmp/apex/images $APEX_IMAGES_DIR/$APEX_VERSION && \
rm -rf /tmp/apex
If your instance is running a version of APEX that has a patch available, then be sure to apply it. Again, you will need access to Oracle Support with the rights to download patches. Set the environment variables:
PATCH_FILE=p32006852_2020_Generic.zip
PATCH_NUMBER=32006852
Then run the snippet below to deploy the changes:
mkdir -p /tmp/$APEX_VERSION && \
unzip /tmp/$PATCH_FILE "$PATCH_NUMBER/images/*" -d /tmp/$APEX_VERSION && \
yes | cp -R /tmp/$APEX_VERSION/$PATCH_NUMBER/images/* $APEX_IMAGES_DIR/$APEX_VERSION && \
rm -rf /tmp/$APEX_VERSION
Create a utility run.sh script to run the container. The script allows one argument to set the port number to map to, and also used to set the container's name.
cd $BASE_PATH && \
cat << EOF > run.sh
#!/usr/bin/env bash

PORT_NUMBER=\${1:-8080}

podman run -d --name=ords_port_\${PORT_NUMBER} \\
  -p \$PORT_NUMBER:8080 \\
  -v \$PWD/conf:/opt/oracle/ords/conf:z \\
  -v $APEX_IMAGES_DIR:/usr/local/tomcat/webapps/i \\
  --restart unless-stopped \\
  ords
EOF
Finally, since we are running this as a rootless container, the firewall rules must be updated to allow communication on port 8080. Execute the following commands:
sudo firewall-cmd --zone=public --add-port 8080/tcp --permanent && \
sudo firewall-cmd --reload
Run the container that's listening on port 8080.
cd $BASE_PATH && bash run.sh 8080
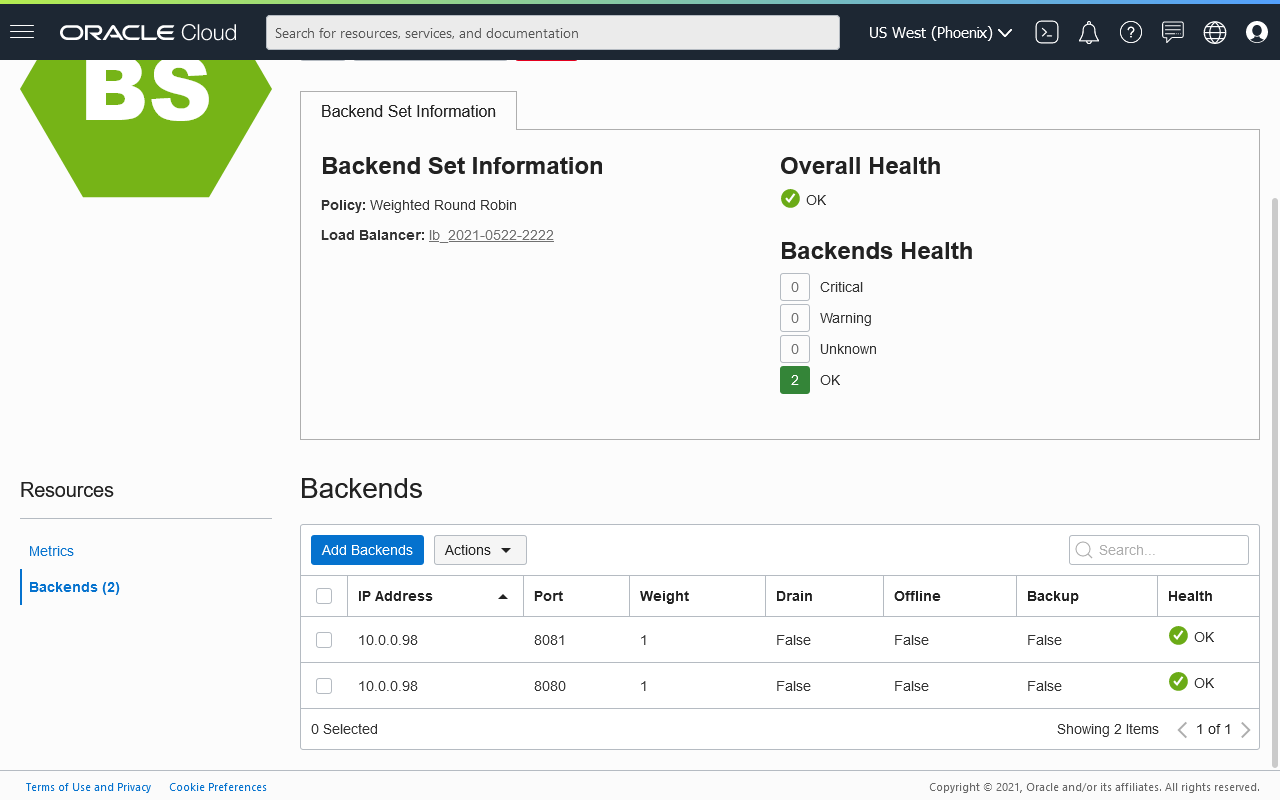
Finally, setup a load balancer for the customer-managed ORDS instance. This was discussed in an earlier post.
Bonus Task
If you are also interested in testing out some "redundancy", you might like to run a second container:
PORT_NUMBER=8081 && \
sudo firewall-cmd --zone=public --add-port $PORT_NUMBER/tcp --permanent && \
sudo firewall-cmd --reload && \
cd $BASE_PATH && bash run.sh $PORT_NUMBER
And then add this as a backend server that's listening on port 8081 to the set. Just be really careful about exceeding the maximum number of concurrent database sessions if this is an Always Free ADB.

To be clear, this is really for experimentation and simulation use only. As a best practice, the second container should be deployed on a separate host, preferably in a different availability domain.
Summary
This is a great addition to the family of OCI resources that Oracle provides. Besides deploying customer-managed ORDS to complement the Autonomous Database, APEX developers can also use them to host other workloads to supercharge web applications. For example, running a WebSocket server using Socket.IO to display realtime updates, or hosting a REST service using Spring Boot. A choice of provisioning low-cost and highly-efficient servers, and the expanded Always Free limits. What's there not to love?
