Running ORDS Against the Autonomous Database - Part 2


In my previous post, we looked at installing and configuring Oracle REST Data Services (ORDS) and have it work with Oracle Application Express (APEX) that comes preinstalled with every Oracle Autonomous Database (ADB). Like APEX, ORDS is also included as a feature of the ADB. However, there are certain situations where you might like to manage your own instance of ORDS.
Three key reasons stand out for me:
- Using my own domain for my APEX applications.
- Managing the number of database connections consumed by ORDS for my Always Free ADB that comes with a limit of 20 concurrent database sessions.
- Restricting "direct" access to the ADB, for example, to connect to the database using external tools like SQL Developer and SQLcl.
The figure below depicts the topology that I will build for my APEX applications.
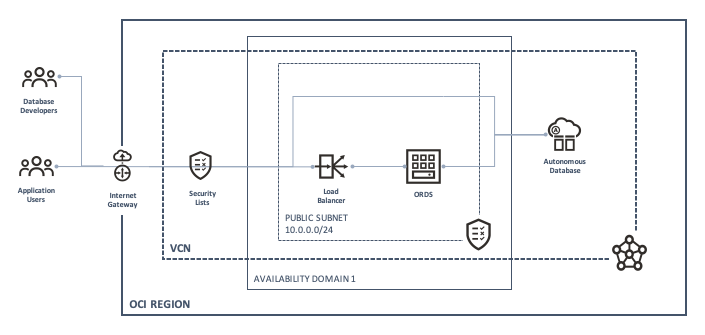
Note that I chose a single subnet for the Load Balancer and Compute. The latter may be deployed in a separate subnet for further isolation.
Load Balancers
Under the Oracle Cloud Free Tier offering, users are provided with one Always Free load balancer. It has a special bandwidth size called Micro and is limited to a maximum of 10 Mbps.
Go to the Load Balancers page. You will find it under the Networks menu item. Click on the blue Create Load Balancer button to begin.
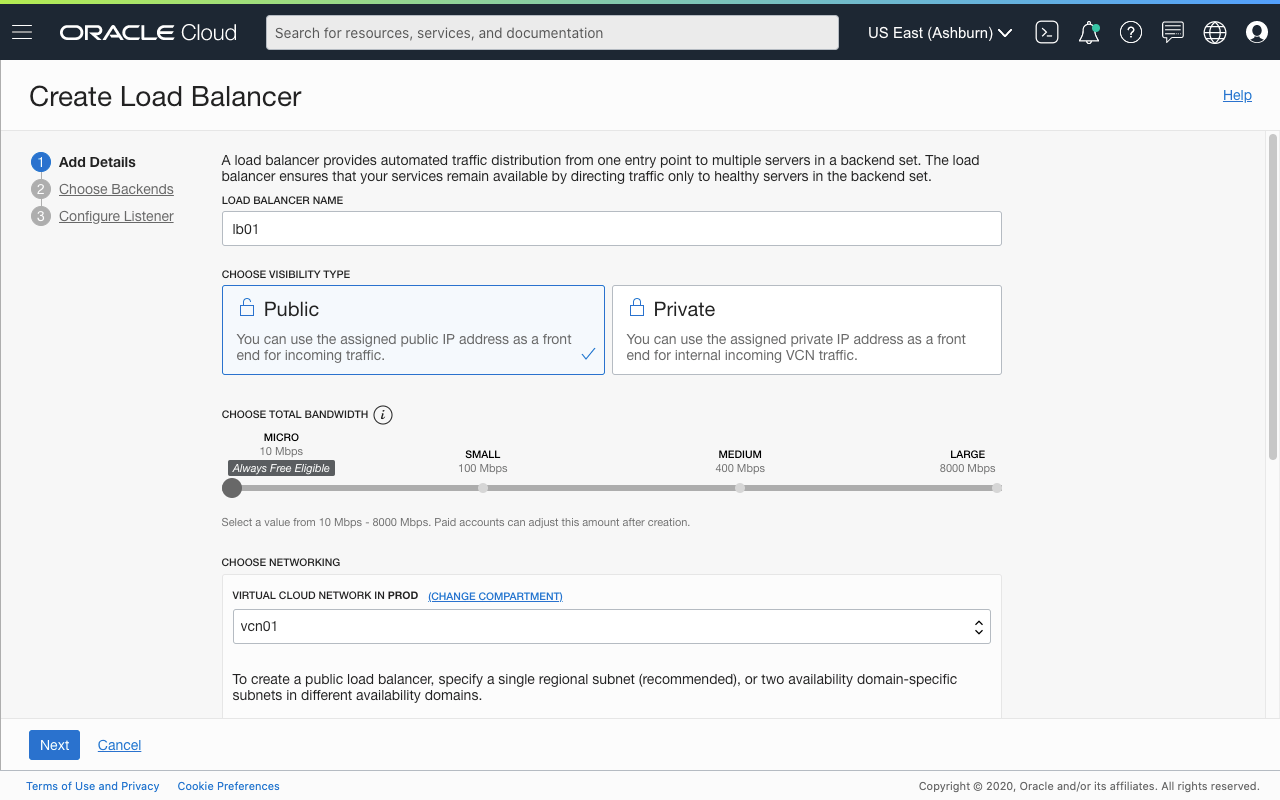
In the first step, do the following:
- Provide a suitable name.
- Set the visibility type to Public.
- Set the total bandwidth to Micro. Note that this size is not selectable if you have already created one, or are not in your Oracle Cloud Infrastructure (OCI) home region.
- Select the appropriate Virtual Cloud Network (VCN) and subnet that the load balancer should be placed in. Make sure that it is setup as a public network, an Internet Gateway and network route rules for bidirectional Internet traffic.
In the next step, leave the default settings. However, on the third and final step, change the listener to listen for HTTP traffic.
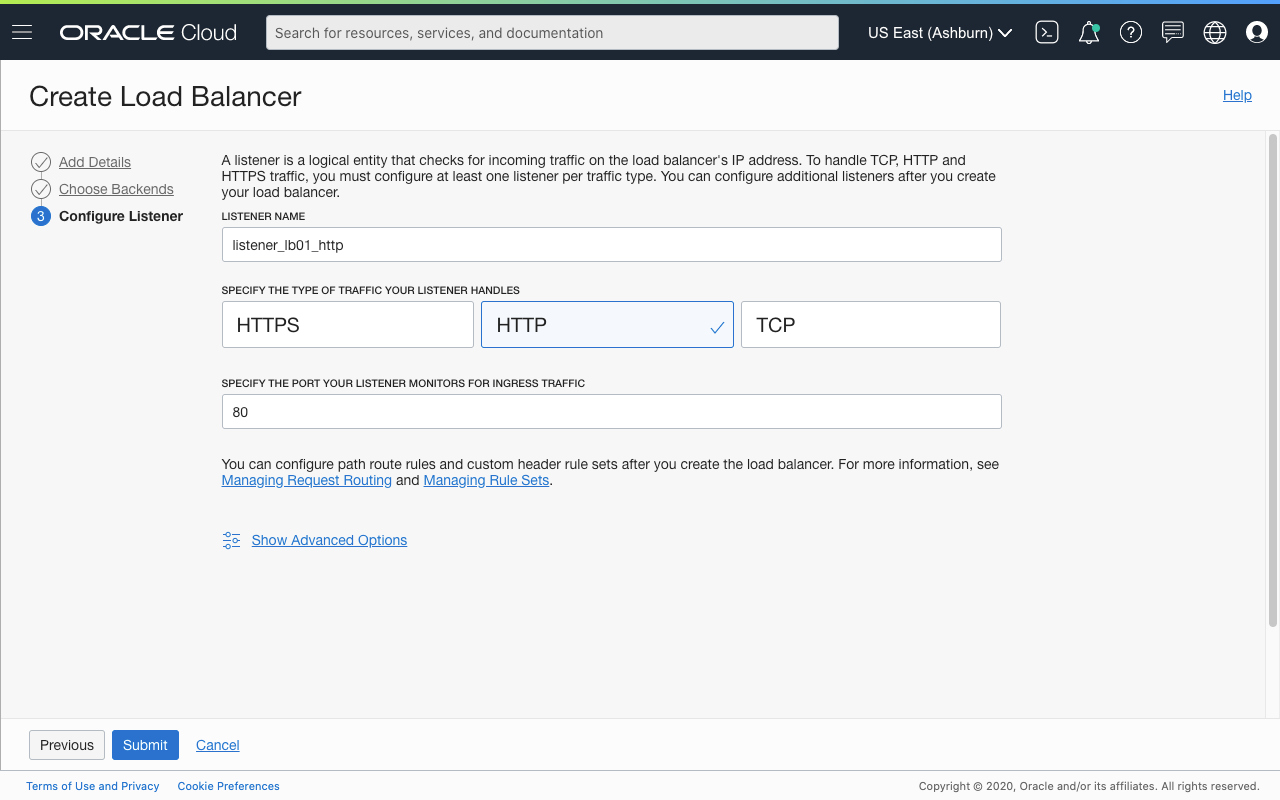
Click on Submit to create the load balancer. A Listener and Backend Set is also created in the process, but we should delete them both once the load balancer is up.
Once created, the Load Balancer Details page will display the Reserved Public IP address it has been assigned with. Use this to update your DNS records.
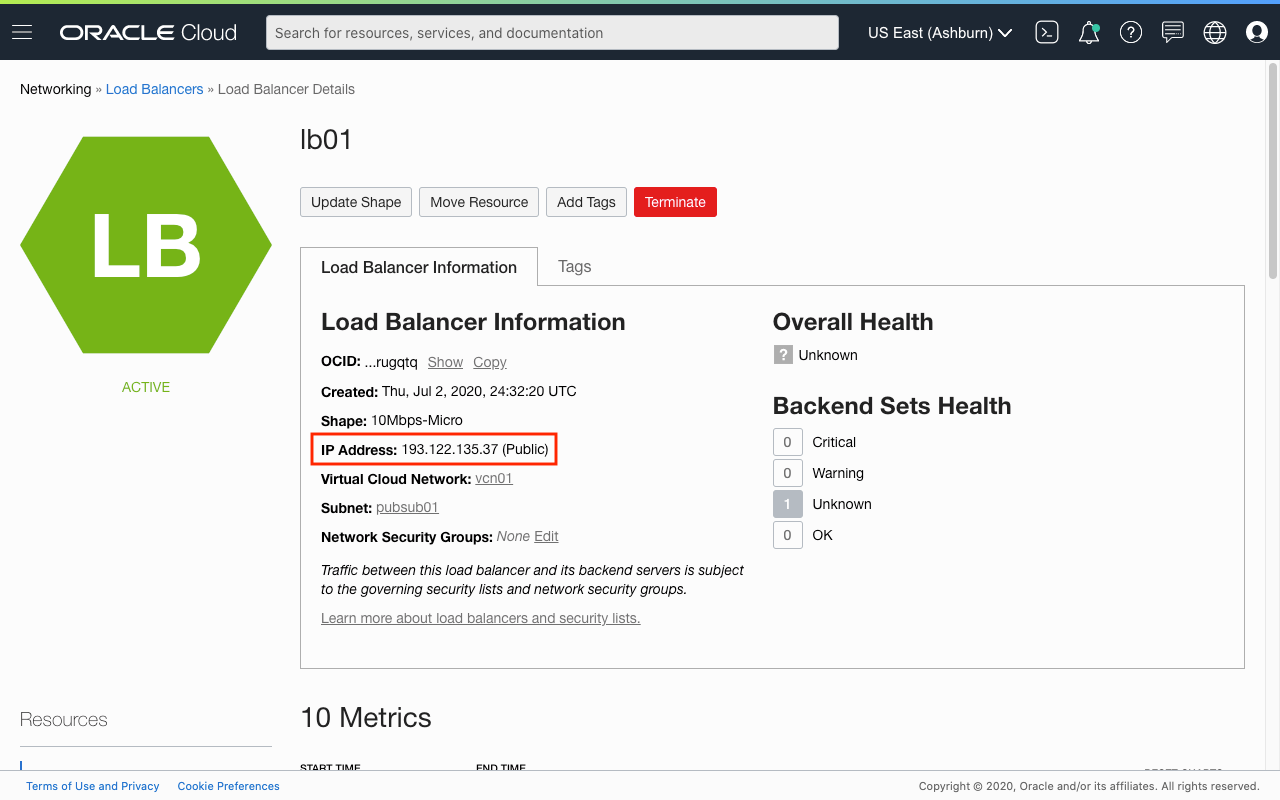
Remember to delete the listener and backend set created by default.
Backend Sets
Next, create the backend set that includes the Compute instance hosting ORDS. On the left side of the Load Balancer Details page, you will find a list of Resources that can be managed. Click on Backend Sets and then click on the blue Create Backend Set button to launch the wizard.
Provide a suitable name and then leave the default values for Traffic Distribution Policy and Session Persistence. Under Health Check, set the following:
- Protocol - HTTP
- Port - 8080
- URL Path - /i/19.2.0.00.18/apex_version.txt
After the backend set is created successfully, click on its name and add backends. You can access the list of backends from the Resources menu on the left of the Backend Set Information page.
To begin, click the blue Add Backends button and then select the Compute instance that is hosting ORDS. Be sure to change the port number to 8080.
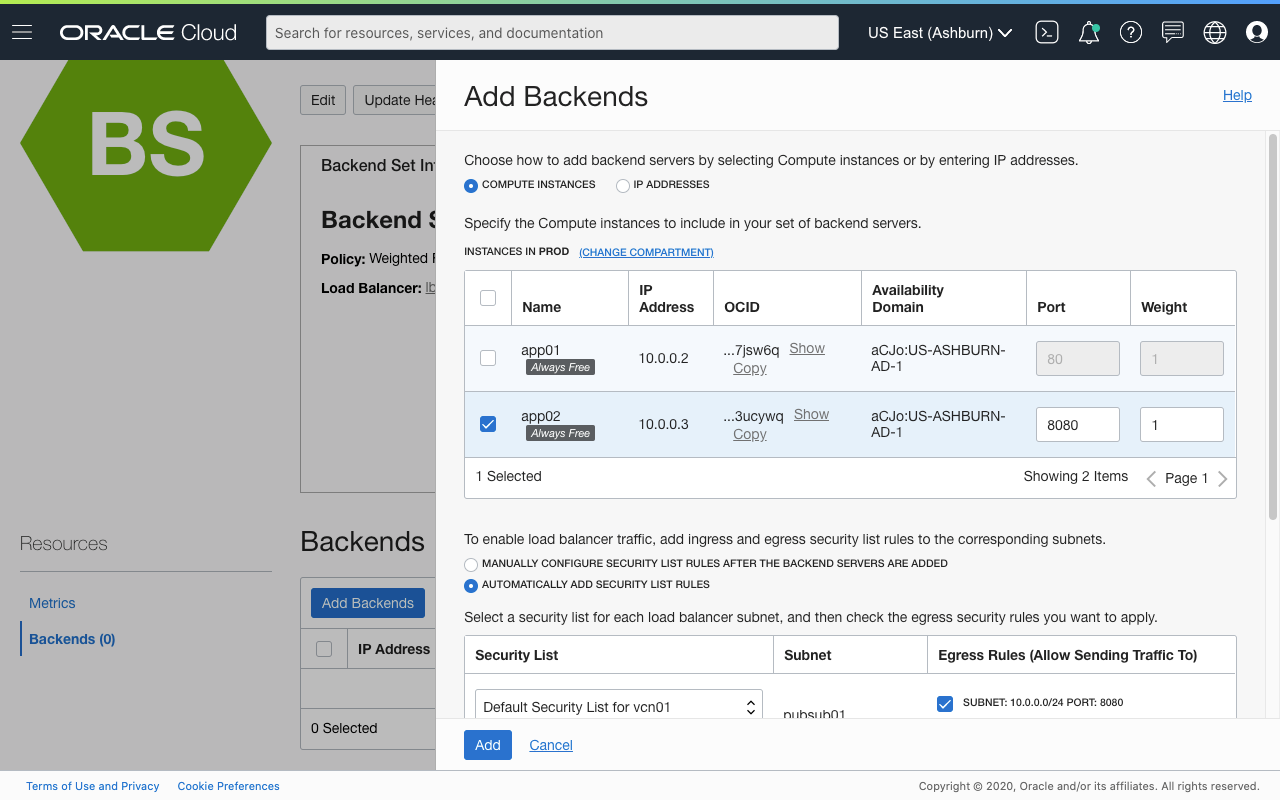
For traffic to flow between the load balancer and backends, appropriate ingress and egress security list rules are required. You may do this manually, but for convenience, you can have the wizard perform these tasks automaticallly.
Click the Add button to complete the process.
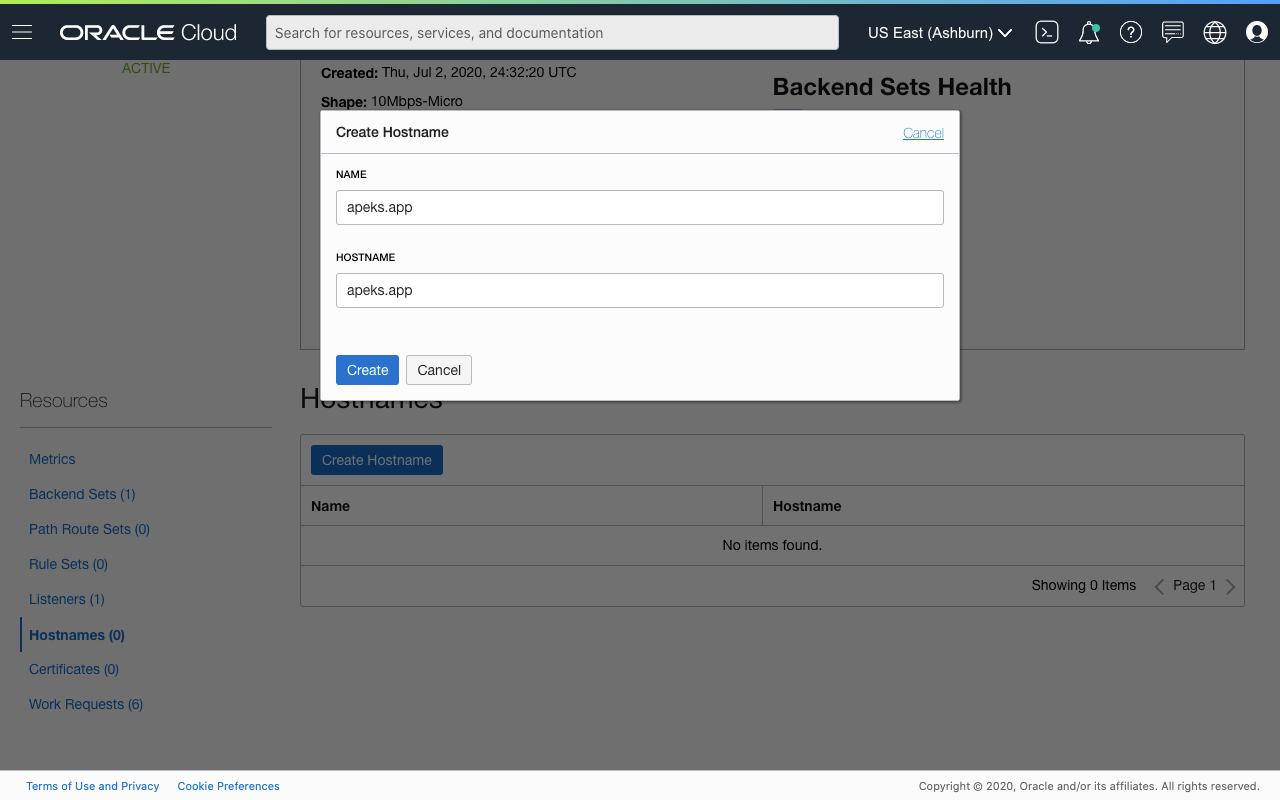
Hostnames
This is an optional resource but is simple to create. Simply provide a name and the URL that will be associated with the listener.
SSL/TLS Certificates
We will want to secure our access to the APEX instance. I will not go into details now on how to obtain a valid SSL/TLS certificate. To create this resource, you should have the following:
- SSL/TLS public certificate
- CA certificate (while optional, I have found issues with REST clients validating with Let's Encrypt certificates)
- Private key
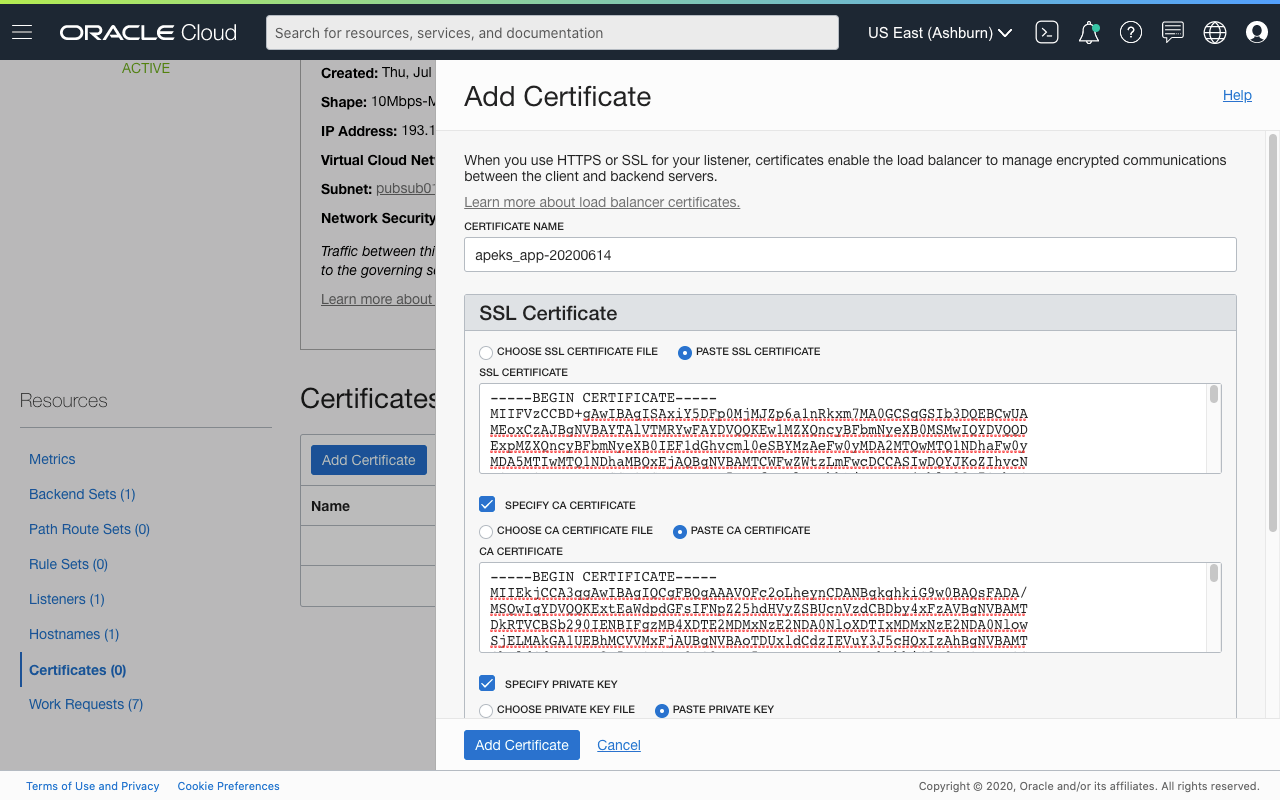
All certificates and key must be in the PEM format.
Update [Sep 14, 2020]
I have made available a project that helps perform some of these tasks. You can read more about it in this follow-up post.
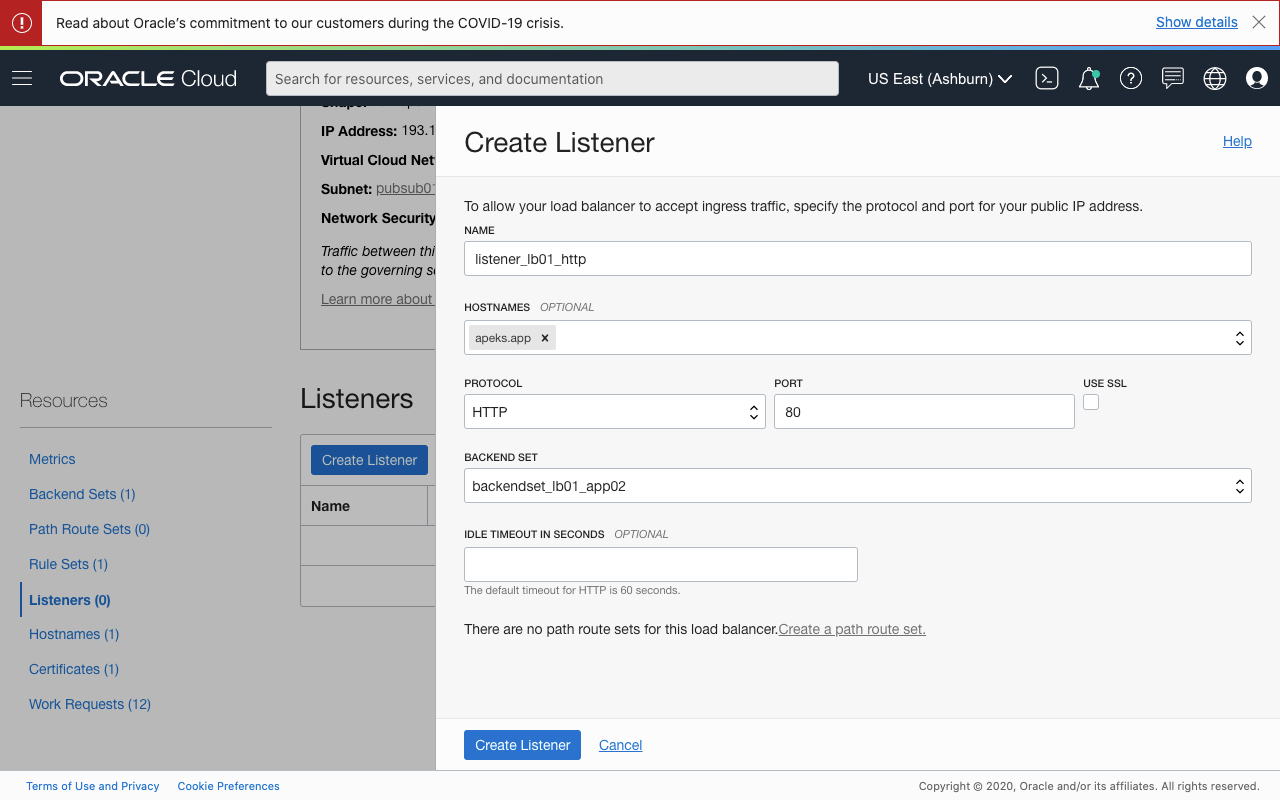
Listeners
Create two listeners, one each for listening to secure and non-secure traffic.
The HTTP listener should have the following attributes:
- A suitable name
- An optional hostname
- Listen using the HTTP protocol
- Listen on port 80
- Use SSL unchecked
- The backend defined for the ORDS server selected
- Default timeout of 60 seconds (or leave it blank)
The HTTPS listener should have the following attributes:
- A suitable name
- An optional hostname
- Listen using the HTTP protocol
- Listen on port 443
- Use SSL checked
- The associated certificate selected
- Verify peer certificate unchecked
- The backend defined for the ORDS server selected
- Idle timeout set to 1800 seconds
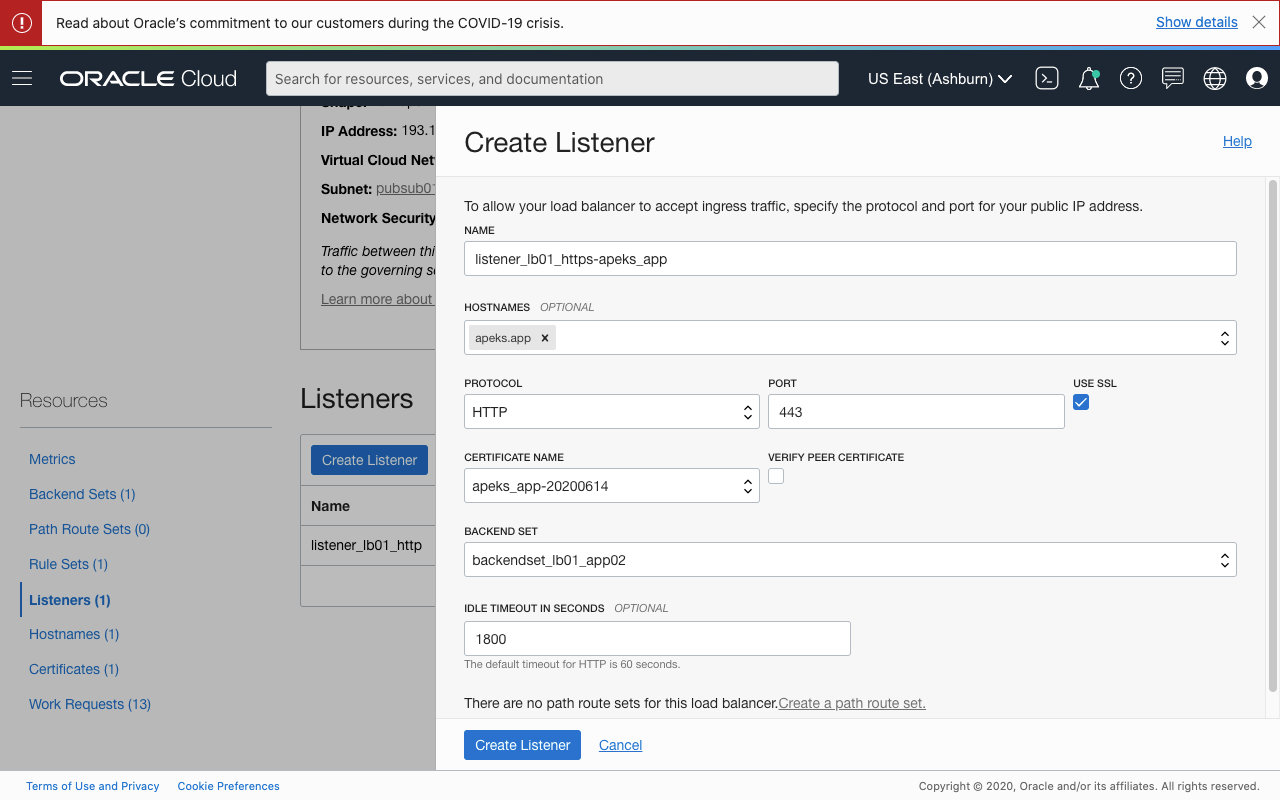
The idle timeout I have suggested can be tweaked to your requirements. I have found 60 seconds to be too short for a functional APEX application. For example, file operations sometimes require a longer length of time to be completed successfully.
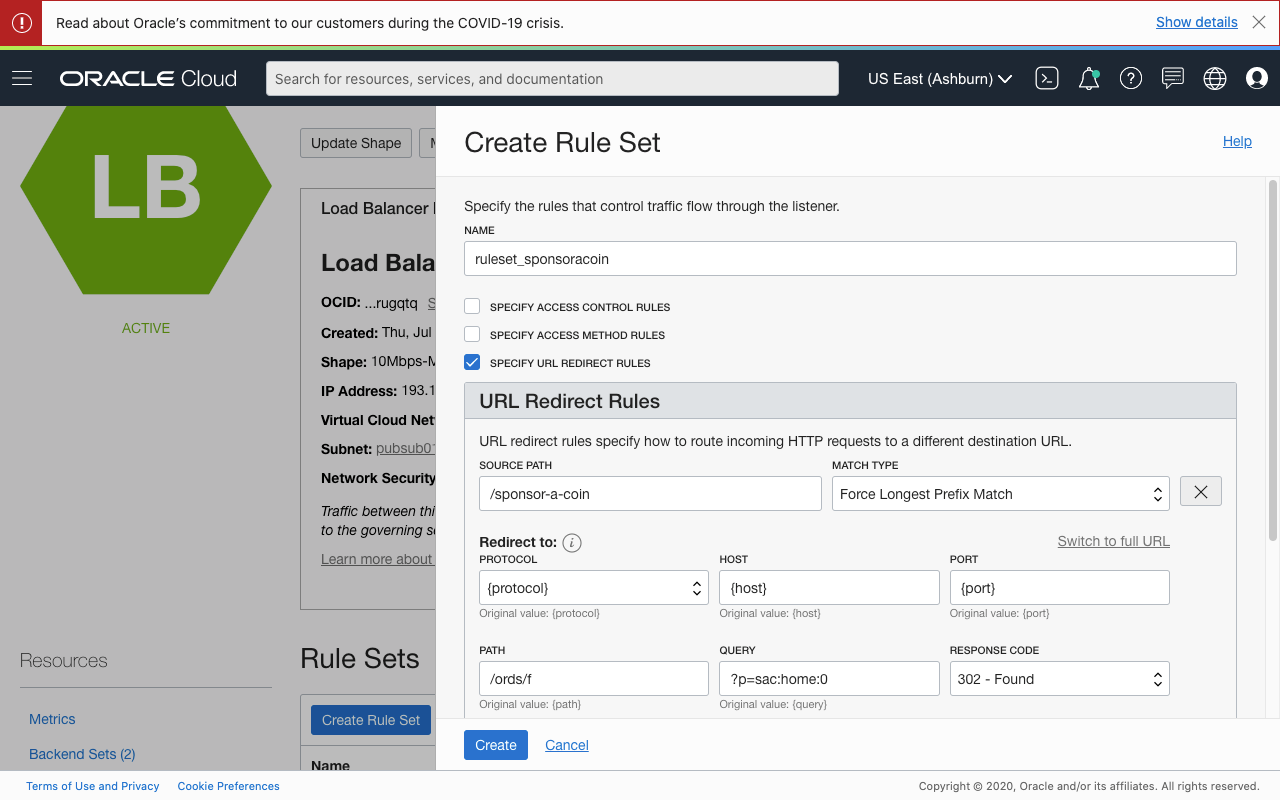
Other Resources
The instructions provided in the blog post gets you a basic setup to support a standard customer-managed ORDS instance. More often than not, you will have other requirements. For example, the APEX Challenge Coin website uses a path alias that links to the APEX application for submitting nominations. In web servers, these are usually addressed by creating URL rewrite rules that redirect you to the correct address. For this purpose, you may use a Rule Set and assign it to a listener. Here's a full list of rule types that you can create:
- Access Control
- Access Method
- URL Redirect
- Request Header
- Response Header
- HTTP Header
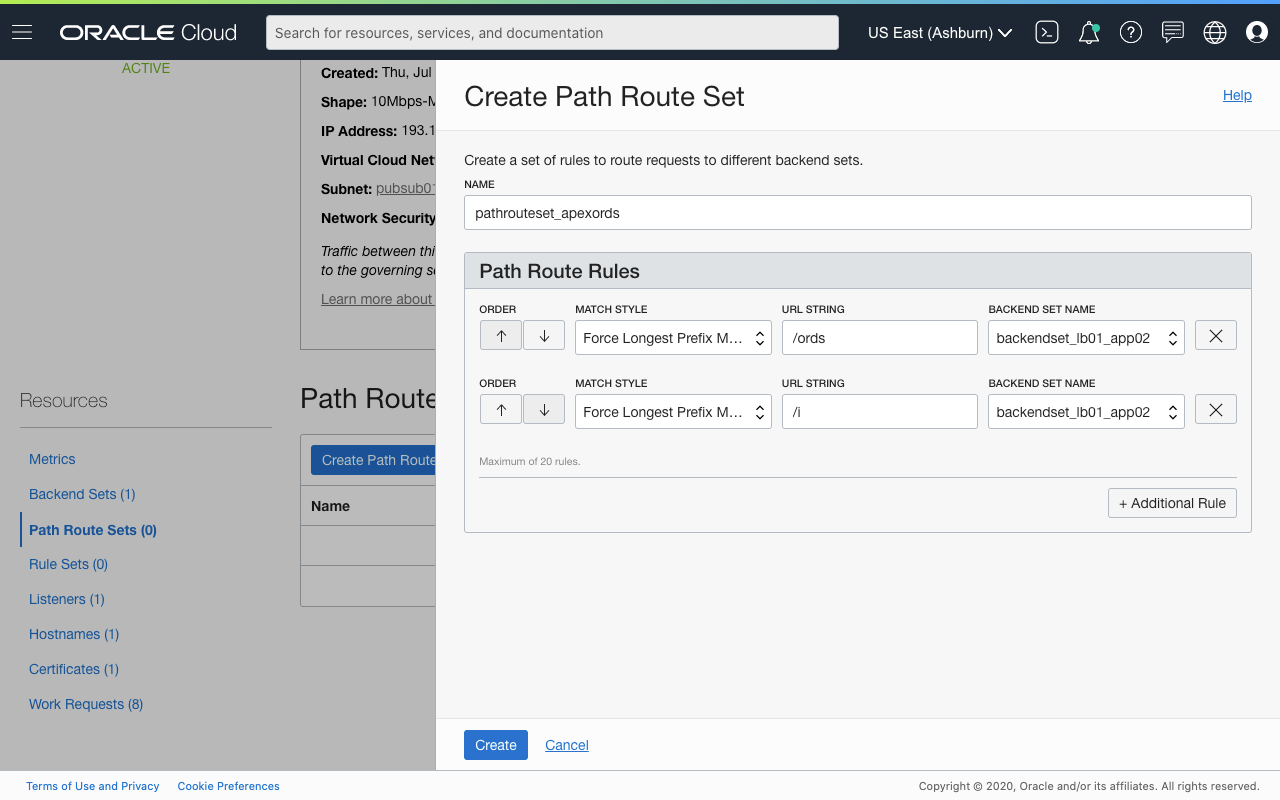
You might also serve other resources hosted on other backend servers. For example, I host some static content on the apeks.app website. For that, I run an Apache Web Server that hosts a single static HTML page. I can create Path Route Sets that will redirect the browser to the appropriate backend server based on the supplied path. Any path that starts with /i or /ords, which is used by APEX and ORDS, hands off to the backend running ORDS. The default, and so every other path, will lead to the other web server.
Update [Sep 14, 2020]
Thanks to Robert Barton for pointing out in the comments. I forgot to mention that once the path route set has been created, assign it to the target listener. In my case, this would be the listener with SSL enabled.
Final Step
Login to the server hosting ORDS as the opc user and edit the ORDS Service Script Configuration File:
sudo vi /etc/ords/ords.conf
Uncomment the line containing:
JAVA_OPTIONS=-Dsecurity.forceHTTPS=true
Restart the ORDS service:
sudo systemctl restart ords
That's it!