Deploy and Use Fine-Tuned LLMs in Oracle APEX


In my previous post, I wrote about how a scikit-learn machine learning (ML) could be trained and deployed on the Oracle Cloud Infrastructure (OCI) Data Science service. The model is deployed on the service's managed infrastructure, allowing developers to simply call a HTTP endpoint to perform ML model inference on the submitted data. In my latest adventure, I built an Oracle APEX application that takes product reviews and then automatically ranks the review using a fine-tuned large language model (LLM) available through Hugging Face.
While OpenAI's ChatGPT has largely dominated the news headlines when it comes to Generative AI, there is a plethora of LLMs out there. Many of them are open sourced and readily available through hubs like Hugging Face. There are a bunch of tutorials that introduce the platform including the available datasets, models, Python, and JavaScript libraries. In this post, I will use the example from their tutorial on fine-tuning a pre-trained model.
The goal is to use the Yelp review dataset to fine-tune BERT, specifically, the distilbert-base-uncased model, to assign a rank that describes the sentiment expressed in a body of text.
Provisioning the Tools
Machine learning tasks can be performed on a CPU, but more often than not, we have a huge performance gained by using a graphical processing unit (GPU). For most people, that's going to be a Nvidia chip. On the OCI, we currently have a choice of the P100, V100, and more recently, A10 and A100. I went with an A10 as it was newer, cheaper than the A100, and has adequate amount of GPU memory. And, more importantly, the tenancy that I was on had sufficient number of GPUs assigned.
You can check your tenancy's service limits to see if you can provision a GPU instance. The resource that you will need is either gpu-a10-count if you wish to run the training on an OCI Compute instance, or ds-gpu-a10-count for an OCI Data Science notebook. These limits are assigned differently for Compute instance and Data Science notebooks. If your tenancy is either a trial, or a PAYG (Pay-as-you-go) account, then these limits are likely 0. For PAYG, you could try making a service limit request, but for trial accounts, it's an uphill battle. And for accounts with a Universal Credits, you might find 16 is the number for gpu-a10-count. Make a service limit request for ds-gpu-a10-count if you wish to run the training in a GPU-powered notebook session.
I initially did not have access to GPU resources on OCI Data Science, so I had provisioned a Compute with a GPU, and then all I needed was to install Miniconda, and I was good to go!
Fine-tune the LLM
In OCI Data Science, you can probably use the Conda environments generalml_p38_cpu_v1 or pytorch20_p39_gpu_v2 (if you have a GPU instance provisioned) for fine-tuning the model. However, for deployment, a GPU instance probably isn't necessary as the time needed to complete the inference is relatively much shorter.
If you do use the Oracle-provided Conda environments, please note that you might need to add any missing dependencies that are specific for working with Hugging Face models and datasets. For me, I opted to create a custom Conda environment as I had started out training the model on a GPU-powered compute instance. This environment was published and later used for the model deployment. Below is the Conda environment file I used.
channels:
    - conda-forge

dependencies:
    - python>=3.8
    - transformers
    - evaluate
    - scikit-learn
    - accelerate
    - pillow
    - numpy
    - pip
    - pip:
        - torch==2.1.0
        - oracle-ads[data,notebook]
NOTE
If you're running this in an OCI Data Science notebook, then the
jupyterlabandipywidgetsdependencies can be omitted as they are automatically added when you create a conda environment using theodsccommand.
from datasets import load_dataset
from transformers import AutoTokenizer, AutoModelForSequenceClassification, TrainingArguments, Trainer
import numpy as np
import evaluate
import torch

def tokenize_function(examples):
    return tokenizer(examples["text"], padding="max_length", truncation=True)

def compute_metrics(eval_pred):
    logits, labels = eval_pred
    predictions = np.argmax(logits, axis=-1)
    return metric.compute(predictions=predictions, references=labels)

device = torch.device("cuda") if torch.cuda.is_available() else torch.device("cpu")

model_name = "distilbert-base-uncased"
dataset = load_dataset("yelp_review_full")
tokenizer = AutoTokenizer.from_pretrained(model_name)
metric = evaluate.load("accuracy")

tokenized_datasets = dataset.map(tokenize_function, batched=True)

small_train_dataset = tokenized_datasets["train"].shuffle(seed=42).select(range(1000))
small_eval_dataset = tokenized_datasets["test"].shuffle(seed=42).select(range(1000))

model = AutoModelForSequenceClassification.from_pretrained(model_name, num_labels=5)
model.to(device)
training_args = TrainingArguments(output_dir="test_trainer",
                                  evaluation_strategy="epoch",
                                  num_train_epochs=20,
                                  fp16=True)

trainer = Trainer(
    model=model,
    args=training_args,
    train_dataset=small_train_dataset,
    eval_dataset=small_eval_dataset,
    compute_metrics=compute_metrics,
)

trainer.train()
I wanted to use this model in a different tenancy, and so, after fine-tuning the model in the Compute instance, I exported the model to be deployed in an OCI Data Science project. To save the model, I ran this function:
model.save_pretrained("./mymodel")
The model artifacts are saved in the local directory mymodel. It contains the files config.json and pytorch_model.bin. A tarball was then created, and transferred to the OCI Data Science project where I would deploy the model.
The distilbert-base-uncased model is relatively small with only 67 million parameters, and thus required only about 4 GB of GPU memory for the training. Just for fun, I attempted to do the training on bert-large-uncased that is a large model with 336 million parameters. Here's how much memory it took.
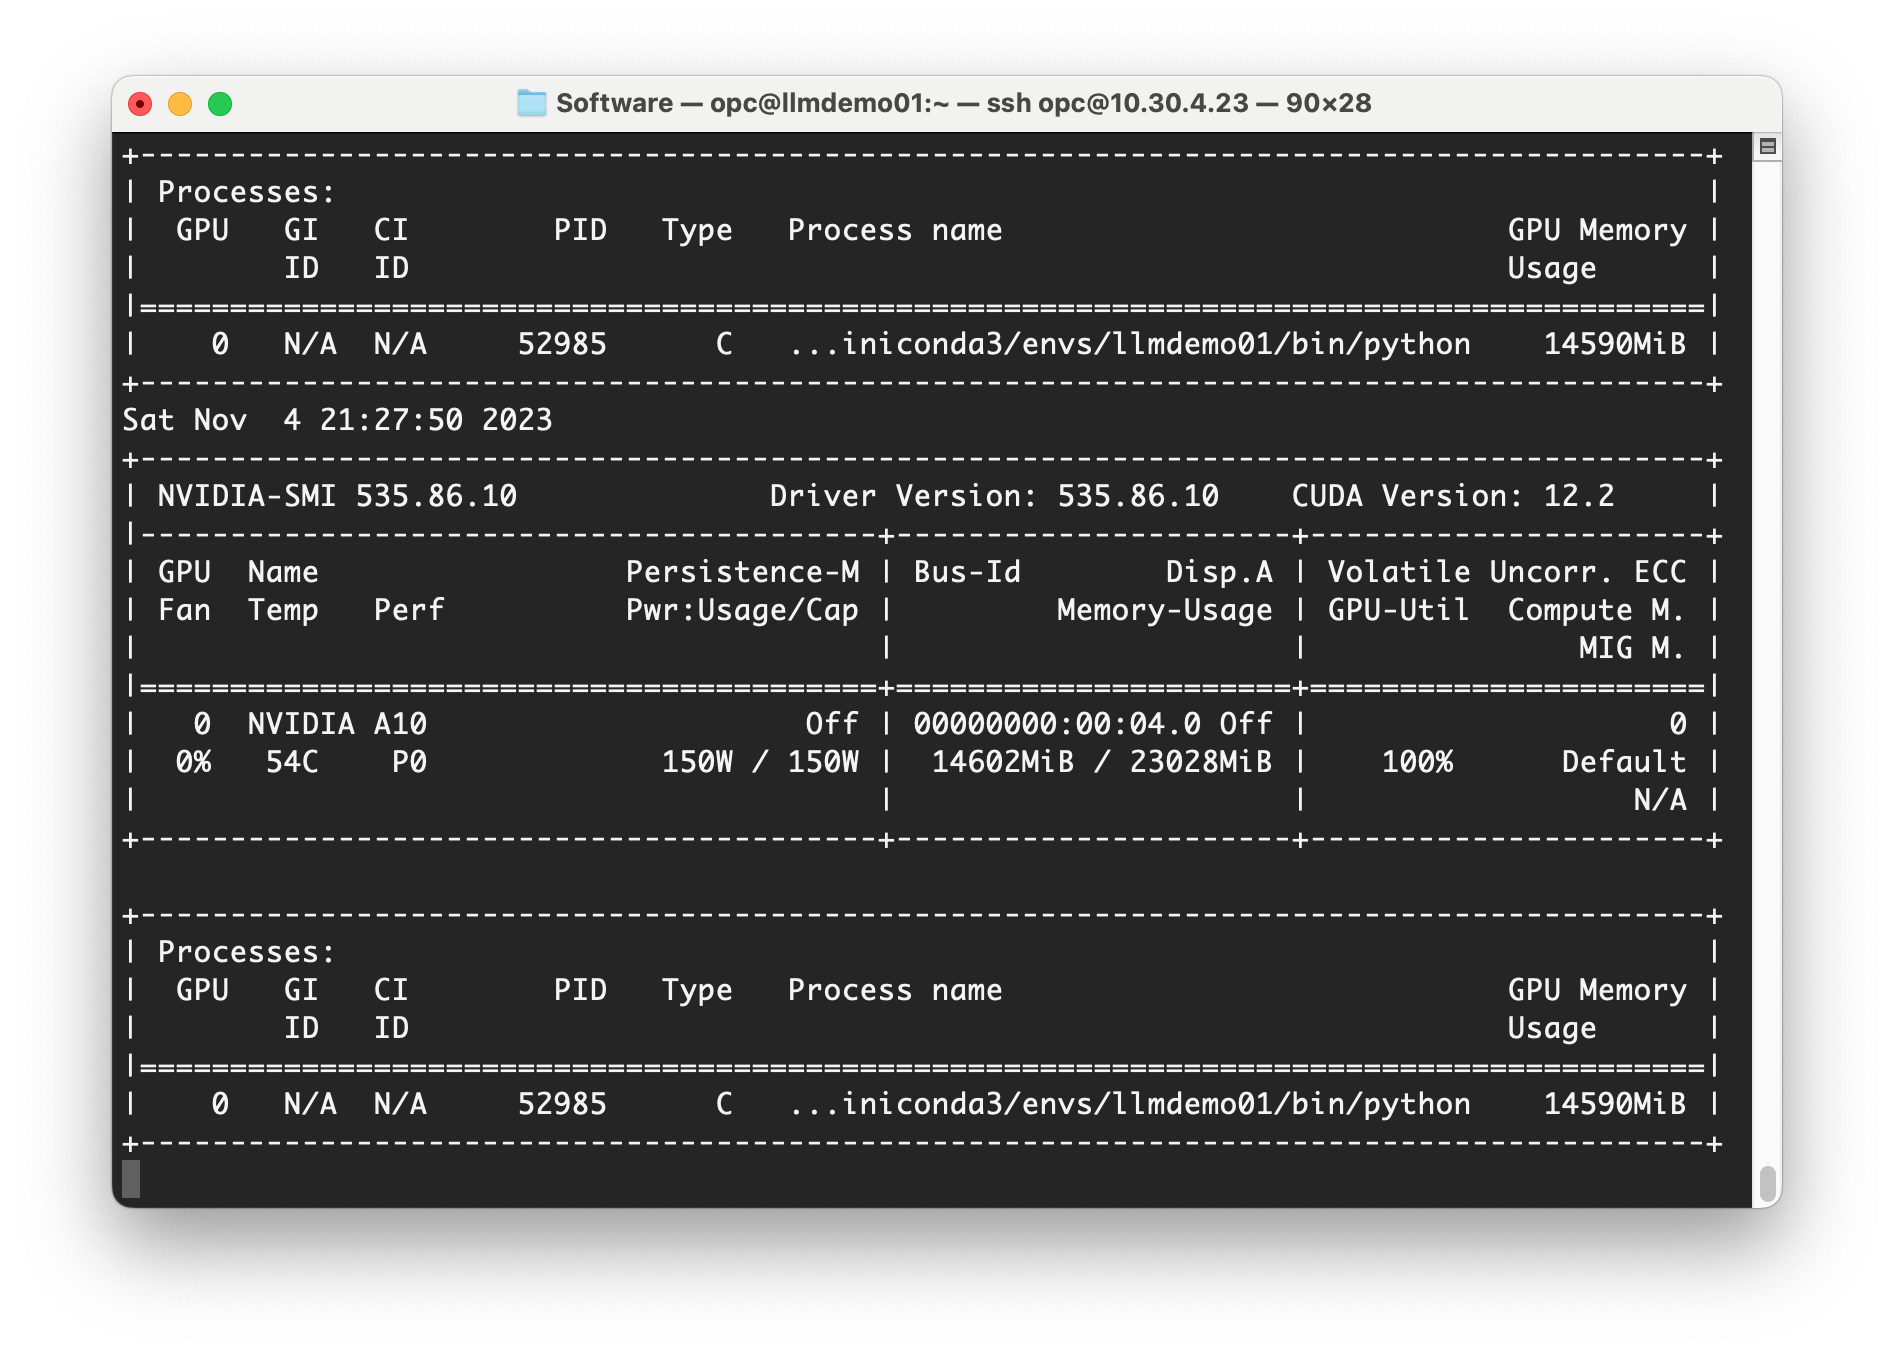
Unfortunately, the accuracy wasn't as impressive even with more parameters. More work would be required before I could eventually use larger LLMs such as this.
Deploy the Fine-tuned LLM
The Oracle Accelerated Data Science Python libraries provides the data scientists and machine learning engineers as suite of utility packages to load datasets from various sources on the OCI, and other repositories, perform machine learning and MLOps tasks, and many more. Since version 2.8.2, the ADS provides support for Hugging Face models using the class HuggingFacePipelineModel. Hugging Face pipelines are convenient facade for developers to use models for inference.
If, like me, you had performed the fine-tuning outside of the OCI Data Science notebook that you will use to prepare and deploy the model, then first upload the tarball containing the model's artifacts, and then extract the files. You can then use the following script to create a Pipeline and test out some predictions. If not, simply create the pipeline using the trained model.
from transformers import AutoTokenizer, AutoModelForSequenceClassification, pipeline

tokenizer = AutoTokenizer.from_pretrained("distilbert-base-uncased")
model = AutoModelForSequenceClassification.from_pretrained("./mymodel")

pipe = pipeline(task="sentiment-analysis", model=model, tokenizer=tokenizer)

review = """
I recently purchased Tim Horton's Nespresso pods for use at home, and I
was impressed by the consistent quality of the coffee. The pods are easy
to store and use, making them a convenient option for busy individuals or
small households. However, the pods can be expensive, especially if you
are a frequent coffee drinker, and may not be available in all locations,
limiting your ability to enjoy Tim Horton's espresso on-the-go. Overall, I
would recommend Tim Horton's Nespresso pods as a convenient way to enjoy
high-quality espresso at home, but keep in mind the cost and availability
limitations.
"""

pipe(review)
Here's a sample of the results:
[{'label': 'LABEL_3', 'score': 0.9998452663421631}]
The next task involves using ADS to prepare, save, and deploy the model on OCI Data Science. The following code assumes that:
- A dynamic group has been created and includes both the notebook sessions and model deployment resource types.
- An Identity and Access Management (IAM) policy has been created and contains the required statements to allow the dynamic group to create and manage the associated OCI resources.
- The Conda environment to be used for the model deployment has been published to the assigned Object Storage bucket.
import ads
from ads.common.model_metadata import UseCaseType
from ads.model.framework.huggingface_model import HuggingFacePipelineModel

ads.set_auth(auth='resource_principal')

artifact_dir = "huggingface_pipeline_model_artifact"
huggingface_pipeline_model = HuggingFacePipelineModel(estimator=pipe, artifact_dir=artifact_dir)

# 1. Prepare
huggingface_pipeline_model.prepare(
    inference_conda_env="oci://conda-envs@*****/conda_environments/cpu/review/0.0.1/review_v0_0_1",
    inference_python_version="3.8",
    training_conda_env="oci://conda-envs@*****/conda_environments/cpu/review/0.0.1/review_v0_0_1",
    use_case_type=UseCaseType.SENTIMENT_ANALYSIS,
    force_overwrite=True,
)

# 2. Save
huggingface_pipeline_model.save()

# 3. Deploy
huggingface_pipeline_model.deploy(
    display_name="Demo Review Model",
    deployment_instance_shape="VM.Standard.E4.Flex",
    deployment_ocpus=1,
    deployment_memory_in_gbs=16,
)

# 4. Print the invocation endpoint
print(f"Endpoint: {huggingface_pipeline_model.model_deployment.url}/predict")
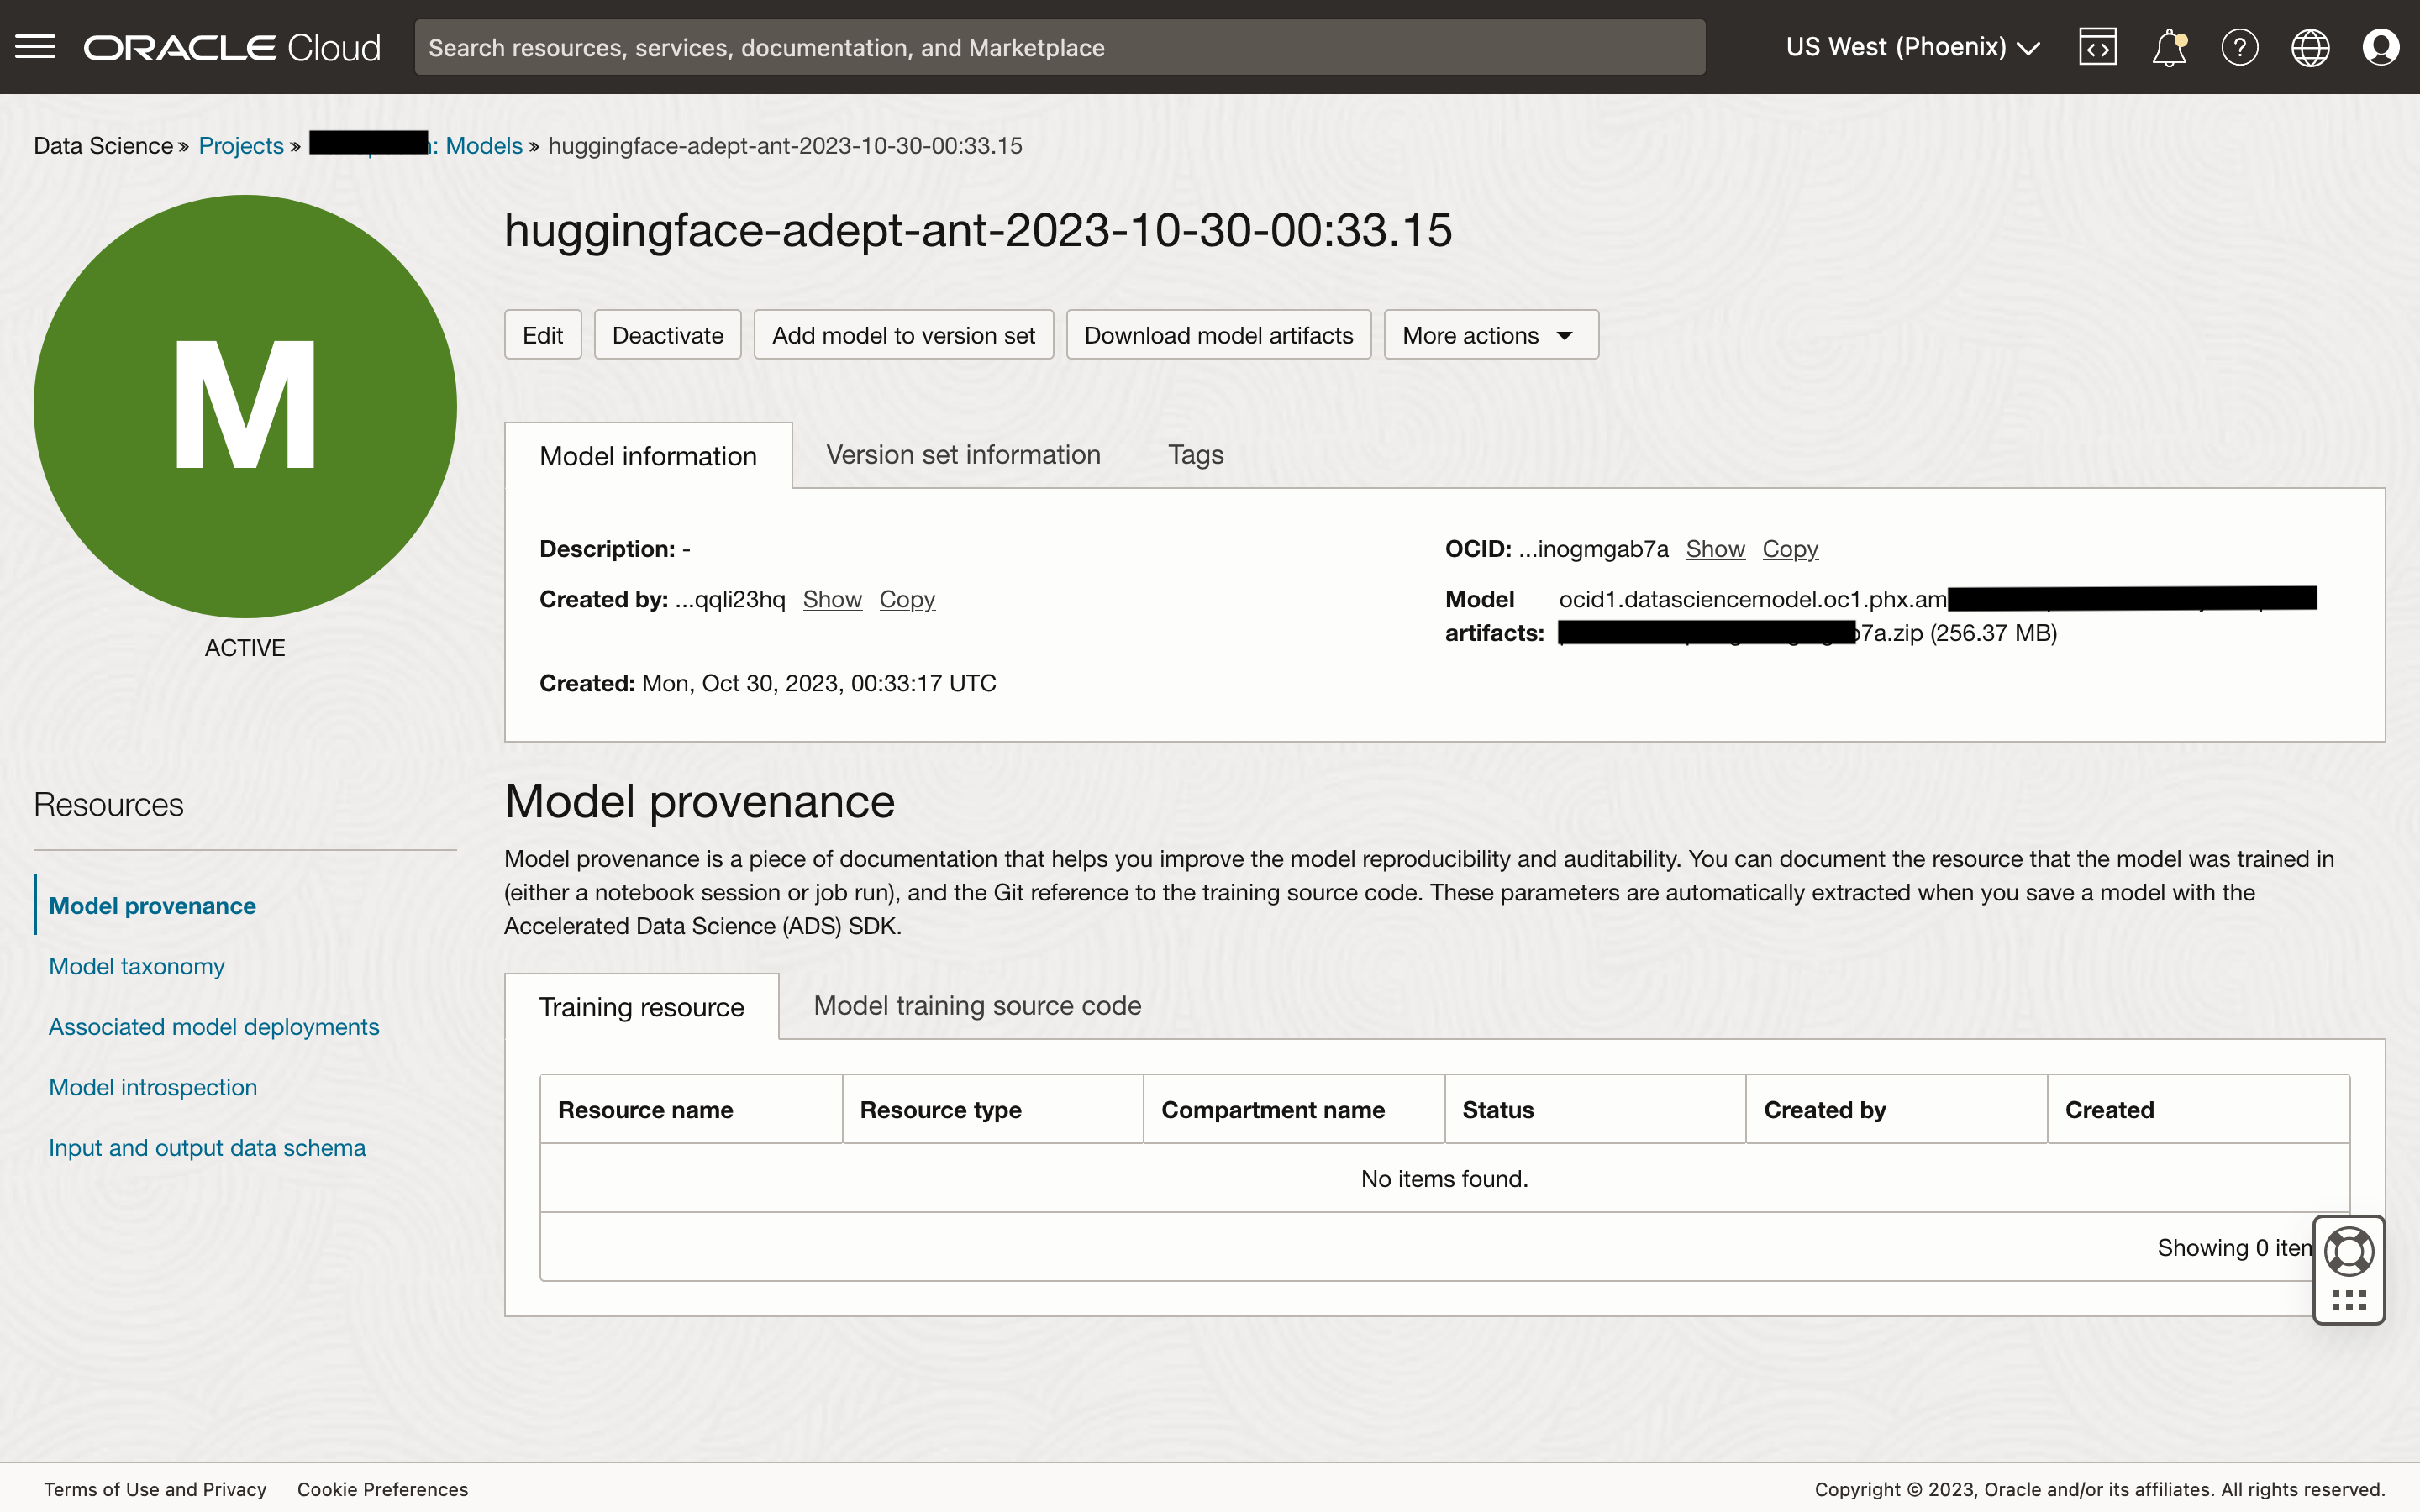
If everything ran as planned, then you should first see that the model has been saved to the model catalog in your OCI Data Science project.
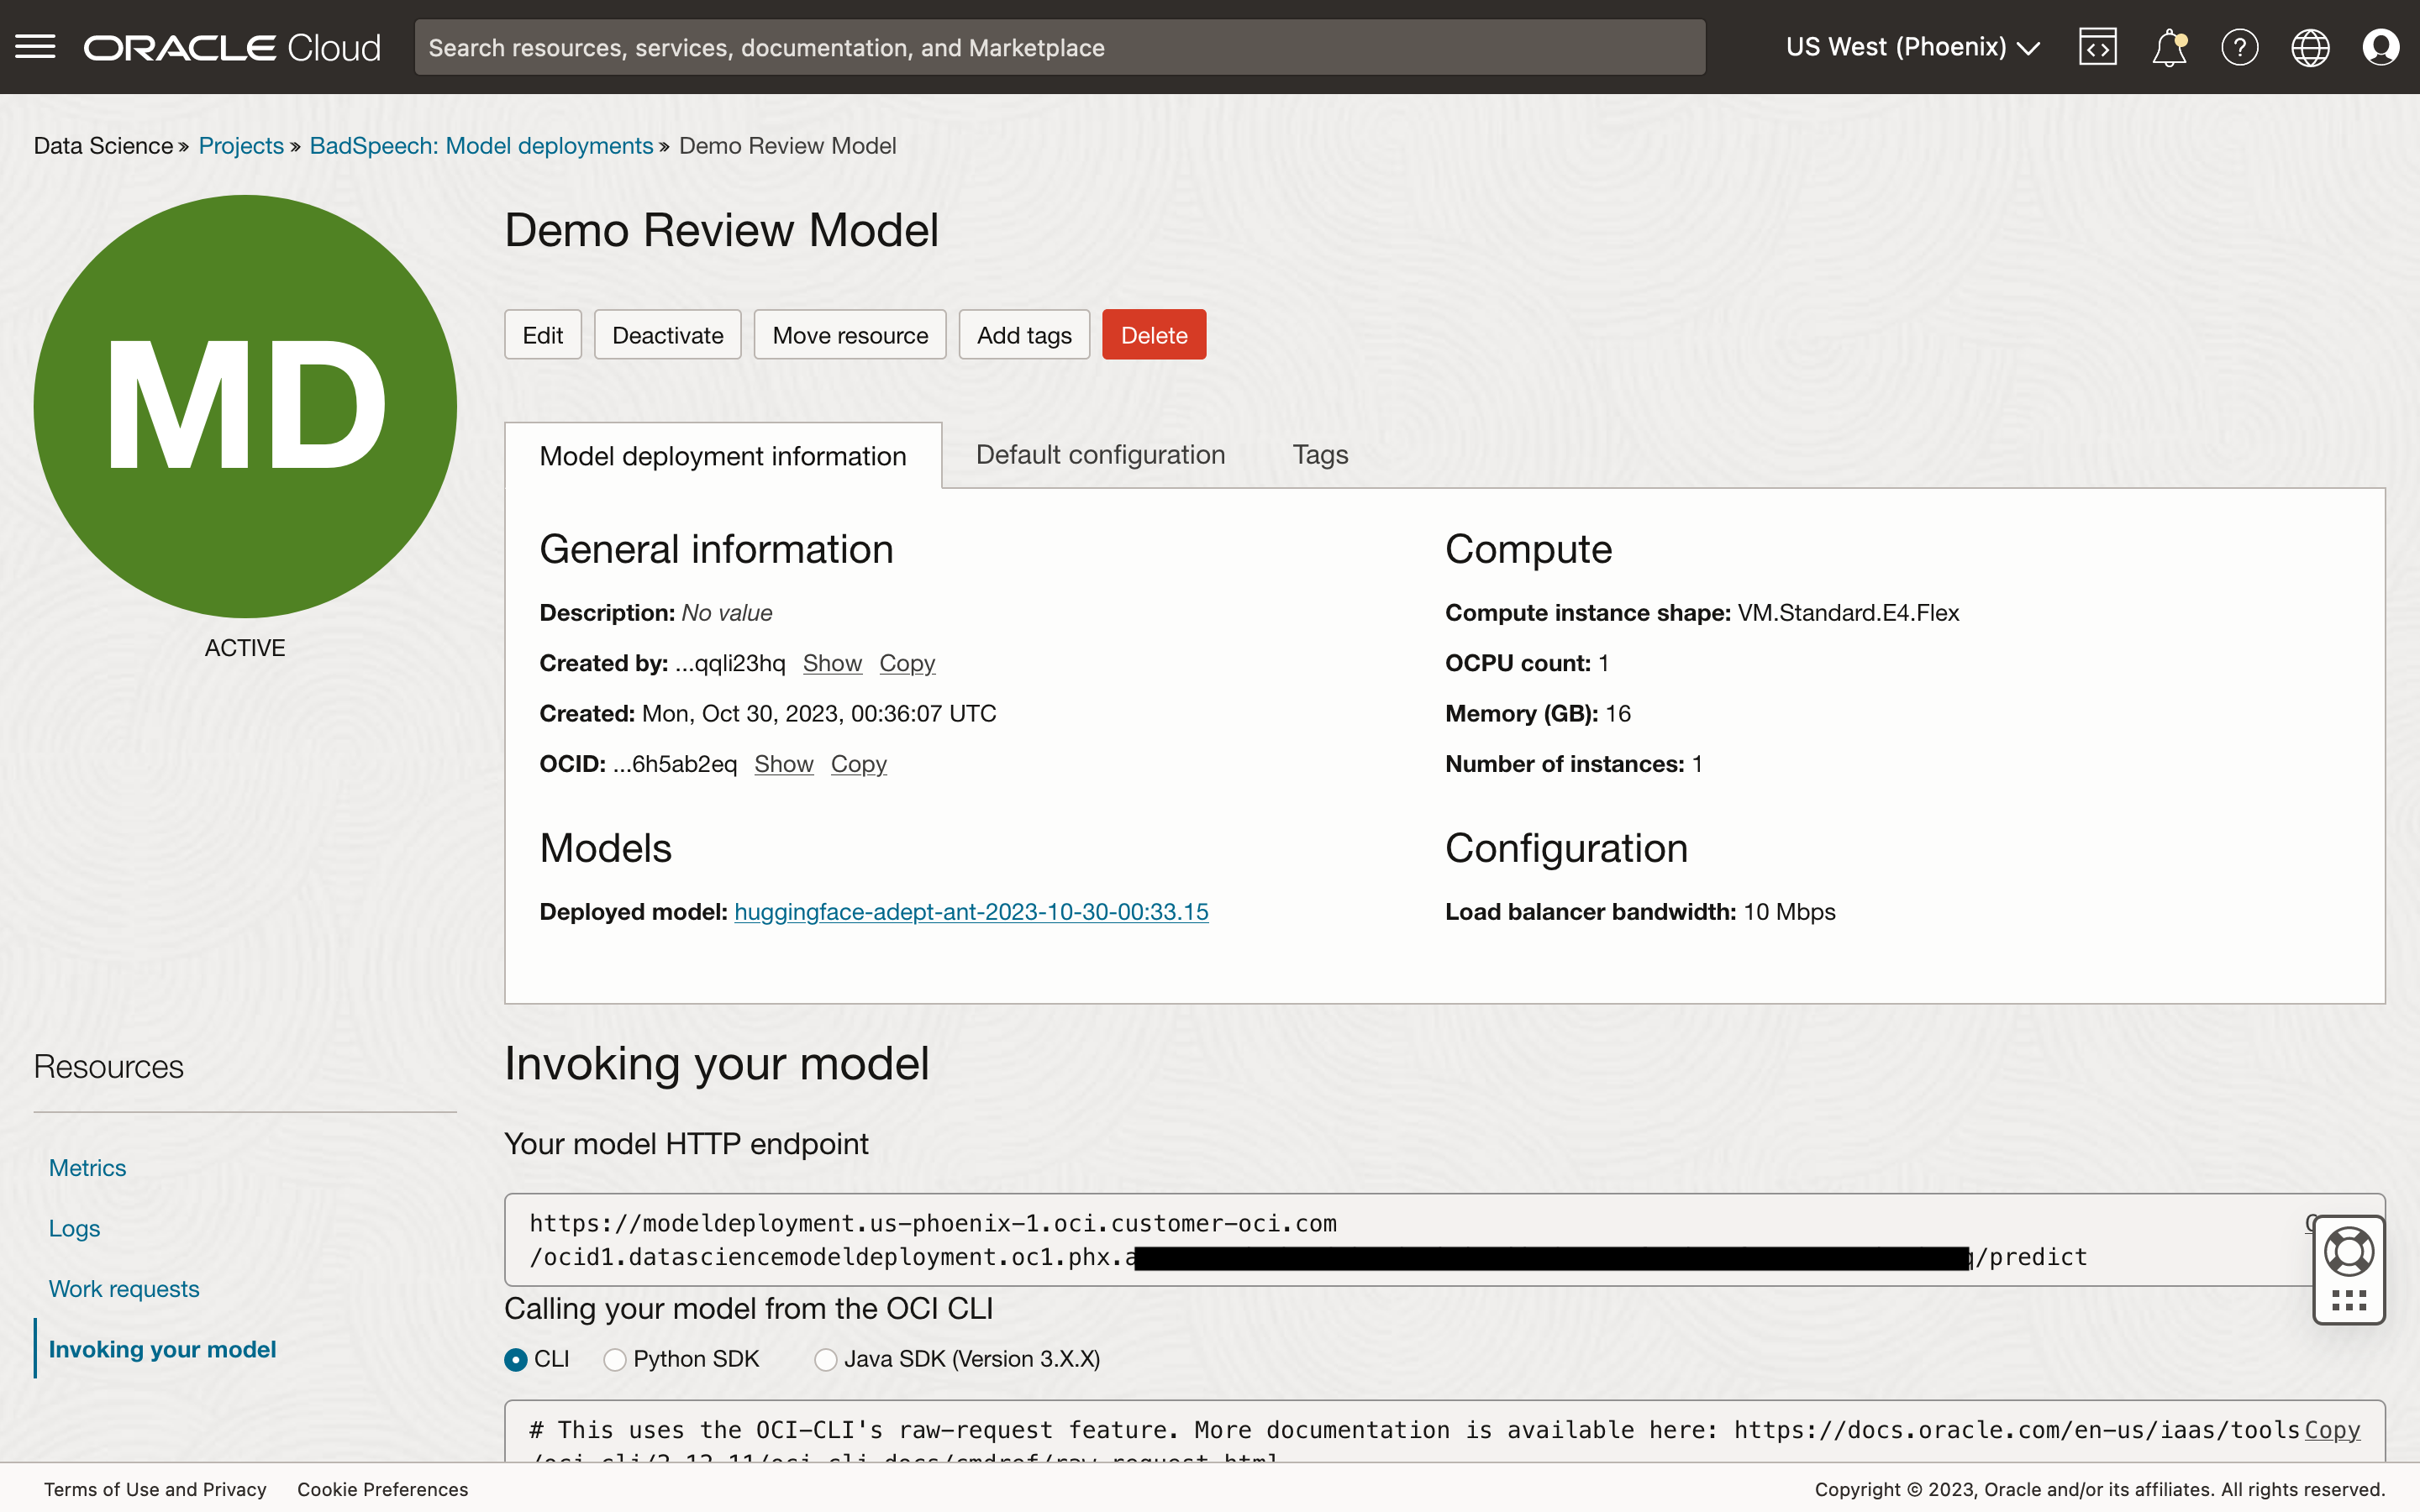
You should also see that the model has been deployed with the resources specified. The Invoking your model view provides the URL to call in your application.
Once deployed, you may invoke the endpoint using APEX_WEB_SERVICE to perform inference on the submitted text. However, like all secure OCI REST APIs, calling this endpoint will require the same HTTP request signature to authenticate with the service. This is an easy task with APEX web credentials support for OCI API keys. If you are new to this, check out either this Oracle blog article, or follow the steps outlined in this LiveLabs workshop.
Also, be sure to add an IAM policy with a statement similar to this one:
allow group ApexAgents to {DATA_SCIENCE_MODEL_DEPLOYMENT_PREDICT} in compartment Demo
The IAM user used by Oracle APEX should be added to this group. This would allow it to call the prediction endpoint for an model deployed in the specified compartment.
Create a page that allows users to enter a review, and then a page process that executes the PL/SQL code below, when the page is submitted.
declare
  l_response clob;
  l_values apex_json.t_values;
  l_prediction_label varchar2(10);
begin
  apex_web_service.g_request_headers(1).name := 'Content-Type';
  apex_web_service.g_request_headers(1).value := 'application/json';

  l_response := apex_web_service.make_rest_request(
    p_credential_static_id => 'OCI_CREDENTIALS'
    , p_http_method => 'POST'
    , p_url => 'https://modeldeployment.us-phoenix-1.oci.customer-oci.com/ocid1.datasciencemodeldeployment.oc1.phx.***/predict'
    , p_body => '[' || apex_json.stringify(:P4_CONTENT) || ']'
  );

  if apex_web_service.g_status_code = 200 then
    apex_json.parse(
      p_values => l_values
      , p_source => l_response
    );

    l_prediction_label := apex_json.get_varchar2(
      p_values => l_values
      , p_path => 'prediction[1].label'
    );

    insert into review(
      prod_id
      , content
      , review_score
      , reviewed_by
      , reviewed_on
    ) values (
      :P4_PROD_ID
      , :P4_CONTENT
      , case l_prediction_label
          when 'LABEL_0' then 1
          when 'LABEL_1' then 2
          when 'LABEL_2' then 3
          when 'LABEL_3' then 4
          when 'LABEL_4' then 5
          else 0
        end
      , :APP_USER
      , systimestamp
    );
  else
    raise_application_error(-20001, 'Failed to process new review.');
  end if;
end;
From the JSON response from calling pipe(review), we know that it contains two attributes: label and score. The label is what we are after, and thus, we extract the value of prediction[1].label using the APEX_JSON package. Sometimes, adding the confidence score can be helpful to the user.
Here's a simple demonstration of the fine-tuned model applied:
What About the OCI AI Language Service
If you are familiar with Oracle's suite of AI Service, there is the OCI Language service that provides "sentiment analysis" using a pre-trained model. This is an easy-to-use API, and I have previously written on how to use it for performing translation tasks.
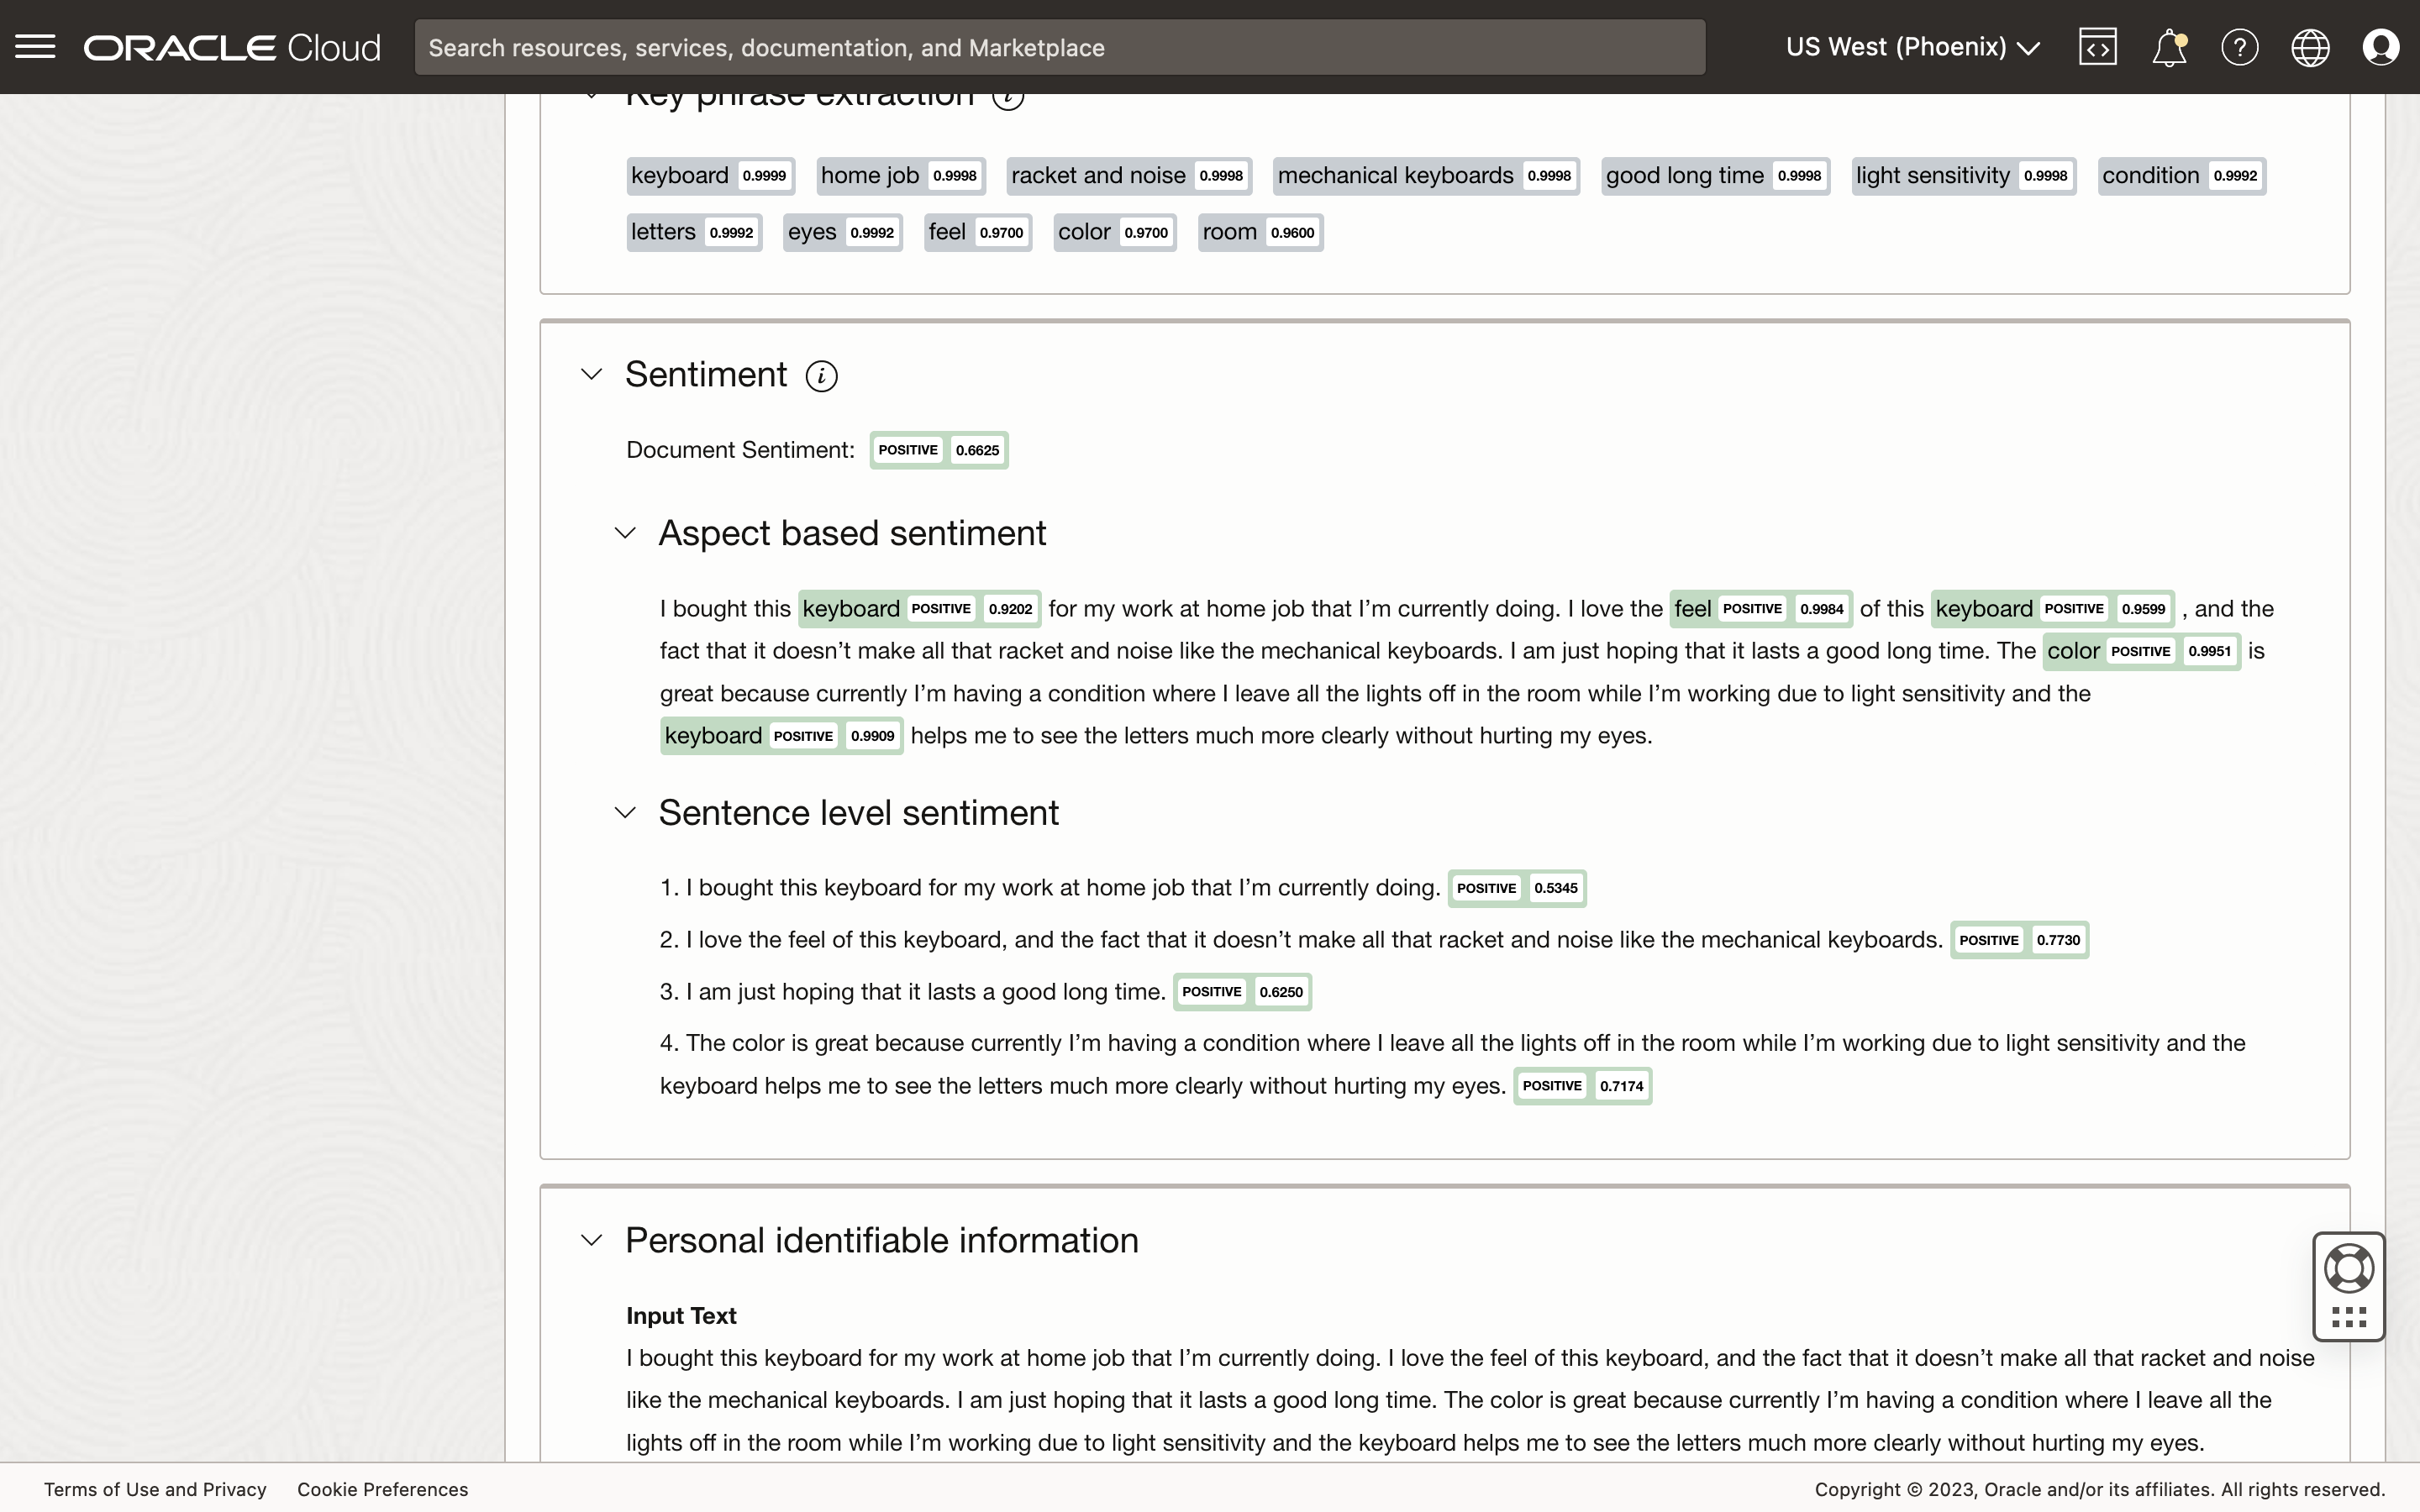
However, with the fine-tuned LLM, my goal was to provide a review score, ranging from 1 to 5, based on the reviewer's comments. The OCI Language pre-trained model returns polarity (positive, negative, mixed, or neutral) scores at the document, sentence, and aspect levels. And at this time, there isn't a custom model that I could train for sentiment analysis.
Summary
The OCI Data Science platform is a great complement to Oracle APEX when it comes to training and integrating machine learning models for specialized tasks. Both the Hugging Face and Oracle ADS libraries make it very easy for a novice like me to quickly build applications with some intelligence. I hope it excites you as much as it does to me. If you have a use case where this combination of technology might help, I'd like to talk. You may reach out to me using this form.
Credits
- Hugging Face for the comprehensive documentation and tutorials, and making available the datasets and models used in this little experiment.
- My employer, Insum, for kindly sponsoring the GPU resources. It can be rather challenging to get them on the OCI, and I hope that can change soon.
- Banner image generated using Stability AI's Stable Diffusion model.